RPAM Connector Installation
Start the RPAM MTC Installer on the RPAM Connector machine (Preparing the Installation), complete the Common Installer Steps , and select RPAM Connector as the configuration type.
- Parameters
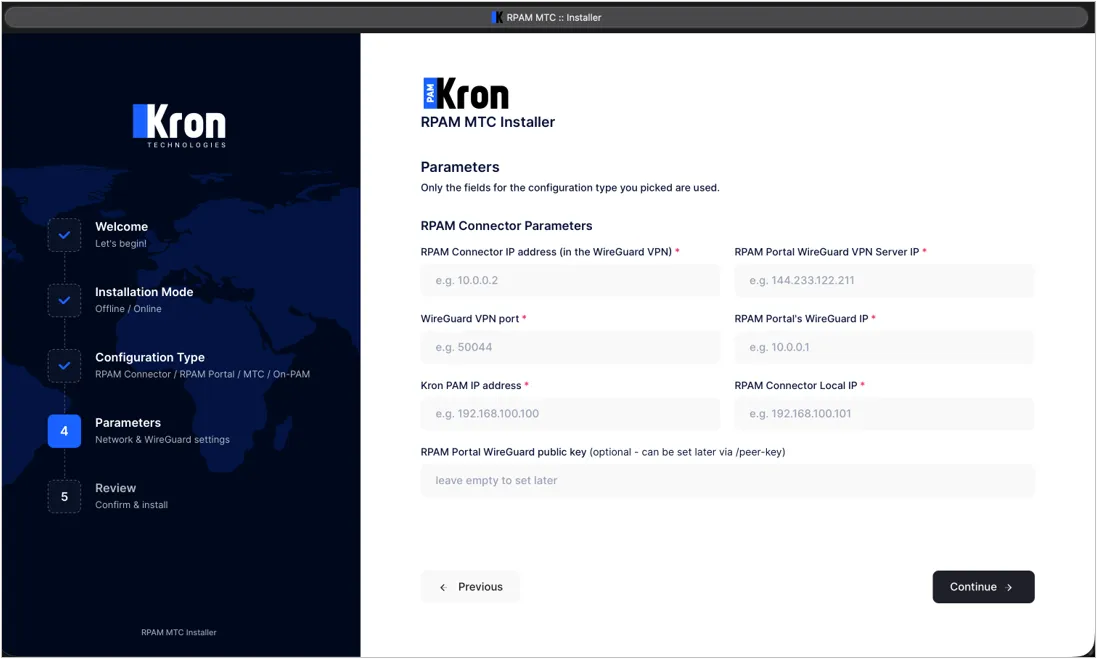
Field | Description |
|---|---|
RPAM Connector IP address (in the WireGuard VPN) | The WireGuard tunnel address of this server (e.g., 10.0.0.2). |
RPAM Portal WireGuard VPN Server IP | The real/reachable IP address of the RPAM Portal (not the tunnel address). This address is used both as the Endpoint of the tunnel and to fetch the public key of the RPAM Portal automatically. |
WireGuard VPN port | The UDP port used by the tunnel (the same port must be used on the RPAM Portal side). |
RPAM Portal's WireGuard IP | The WireGuard tunnel address of the RPAM Portal (e.g., 10.0.0.1). |
Kron PAM IP address | The local network IP address of the real Kron PAM Server on this site. It is not related to WireGuard; the 443 traffic is forwarded to this address with iptables. |
RPAM Connector Local IP | The local network IP address of this server (again, not the WireGuard tunnel address); it is used for DNAT/SNAT. |
RPAM Portal WireGuard public key (optional) | If left empty, the installer tries to fetch it automatically from the "RPAM Portal WireGuard VPN Server IP" address above. If the RPAM Portal is not installed yet, leave it empty and complete it after the installation as explained in Section 9. |
RPAM Portal WireGuard VPN Server IP and Kron PAM IP address are two independent addresses serving different purposes; do not mix them up.
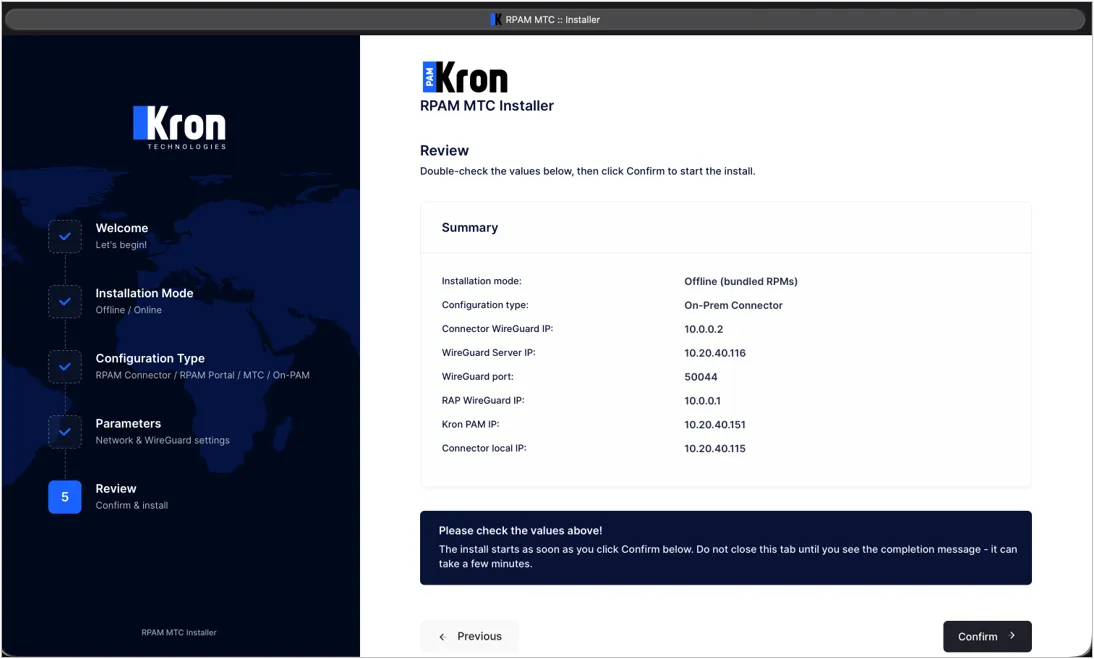
- Review and Confirm
All entered values are summarized on this screen. If something is wrong, go back with Previous and correct it. If everything is correct, press Confirm.
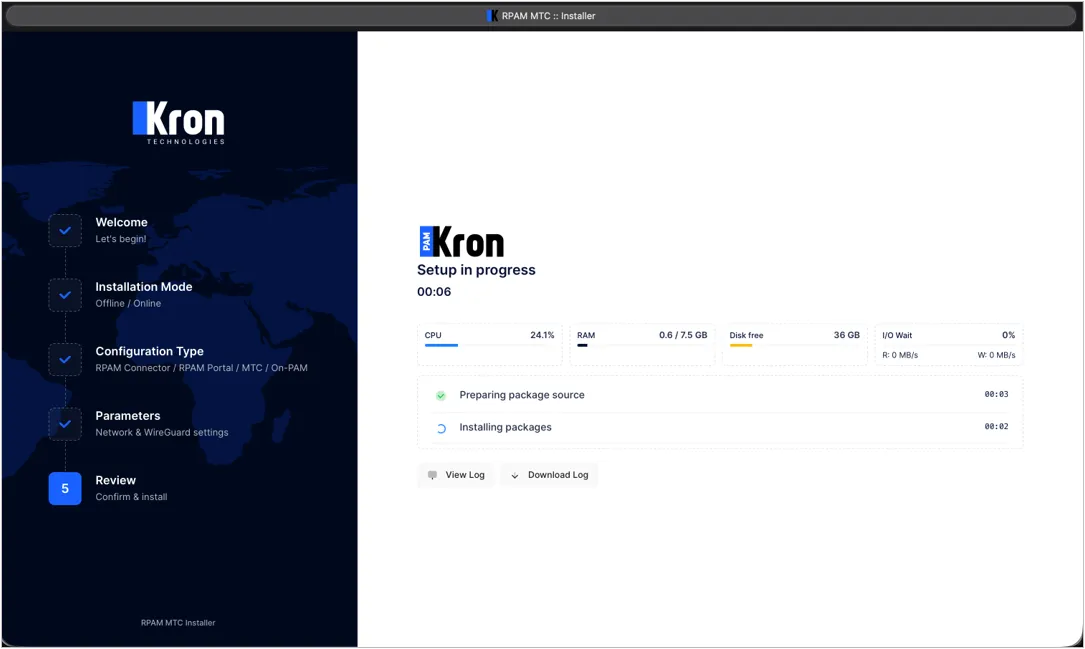
- Installation Progress
While the installation runs in the background, the following are shown on the screen:
· The step-by-step progress list (package installation, WireGuard module, system settings, routing, service start),
· The live log output (can be viewed in detail with View Log),
· The CPU/RAM/disk/IO metrics.
In addition to installing the packages and configuring WireGuard, the RPAM Connector installation sets SELinux to permissive, enables IP forwarding, stops and masks the firewalld service, and adds the iptables DNAT/SNAT rules that forward TCP 443 to the Kron PAM Server. The iptables rules are saved to /pam/routing.table and restored by /pam/restore.routing, which runs every minute via cron.
- Installation Result
When the installation is completed, the WireGuard public key of this server is shown. This value must be entered on the peer side, i.e., in the RPAM Portal installation (or on the /peer-key page of the RPAM Portal, see Section 9). Warnings, if any, are listed on this screen. If the WireGuard module could not be loaded, a Reboot now button is shown (see Common Installer Steps > Steps 4 and 5).
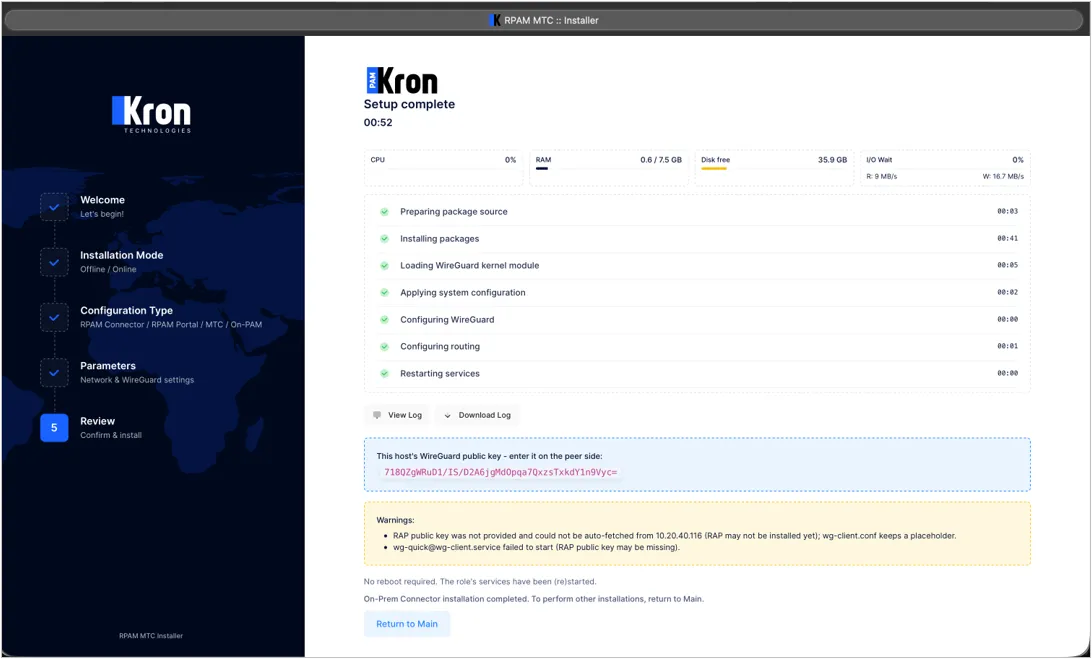
The warnings in Figure 13 ("RAP public key was not provided and could not be auto-fetched", "[email protected] failed to start") are expected when the RPAM Portal has not been installed yet. Complete the peer public key after the RPAM Portal installation as explained in Completing the Peer Key Exchange on the RPAM Connector.
- Verification
Linux CLI | [root@connector~]# systemctl status [email protected] [root@connector~]# wg show [root@connector~]# ping {RPAM Portal's WireGuard IP} |
|---|---|
Example | [root@connector~]# ping 10.0.0.1 |
If the latest handshake field in the wg show output is filled in and the transfer line shows both sent and received data, the tunnel is really working.