4.3 Secret Data Vault
Single Connect Secret Data Vault enables to store SSH Keys, SSL Keys and other sensitive data.
Create Secret Data
- Log in to the Single Connect GUI
- Navigate to Secret Data Vault
- Enter related information and Save
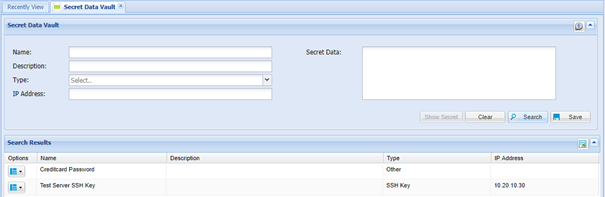
Showing-Editing Secret Data Definition
- Log in to the Single Connect Web GUI
- Navigate to Secret Data Vault
- Select the secret data to edit or show. and click on the “Options” button
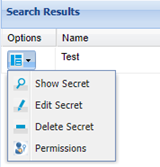
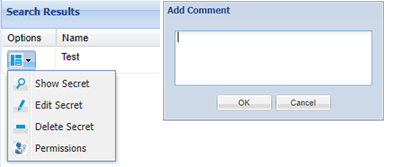
4. Select “Show Secret” to show secret data and enter a reason to display the data
After revealing secret data, the “Secret Data” field becomes editable
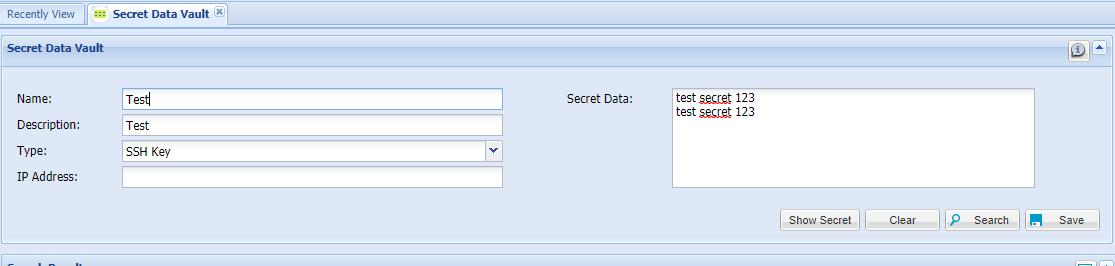
5. Edit the “secret data” field as desired and save to change the secret data
Select “Edit Secret” from the options after step 2 to edit the name, description, type, and IP address fields.
Permissions for Secret Data
Some authorizations must be given to users to be able to create secret data in the vault. Also, these users who are in an “admin group” or have the “sc.secret.data.vault.admin” functions have authority to show, edit, and delete all secret data defined in Single Connect.
- Give Admin Group Authority
- Log in to the Single Connect Web GUI
- Navigate to User Management > User Accounts
- Open the User Group Definition tab
- Select the related User group and tick the check-box of “Admin Group” and Save
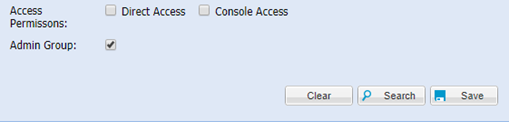
- Define the “admin” Portal Function
- Log in to the Single Connect Web GUI
- Navigate to Policy Control > Portal Functions
- Set the “sc.secret.data.vault.admin” function for the user Group with Portal Realm
Authorizations can be given to users to be able to create, show, edit, delete the secret data for members of same user group. The full control permission is only valid when the users who have the “sc.secret.data.vault.group.admin” functions are in the same user group with the user who creates the secret data.
- Define “group admin” Portal Function
- Log in to the Single Connect Web GUI
- Navigate to Policy Control > Portal Functions
- Set the “sc.secret.data.vault.group.admin” function on the user Group with Portal Realm
Check Managing Menu List chapter for creating Portal Realms
Different authorization levels can be defined to Secret Data. To set permissions for Secret Data:
- Log in to the Single Connect Web GUI
- Navigate to Secret Data Vault
- Select a secret data to set permissions for and click Options button
- Select the “Permissions” option
- Select the “user group” and the “permission type”.
- Save
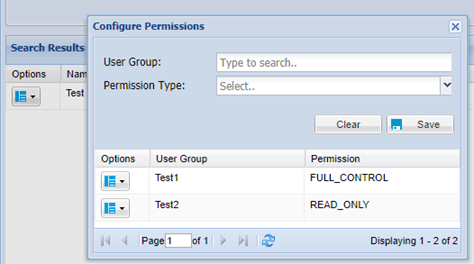
Permission Types:
READ_ONLY: These users have only authority to see Secret Data.
FULL_CONTROL: Users who have full control permission are admin of this Secret Data. The users have authority to delete, edit, show secret data and give permissions.