2.2 Managing User Groups
3 min
Managing User Groups
Authorized users can manage User Groups and add users to User Groups.
Creating User Groups
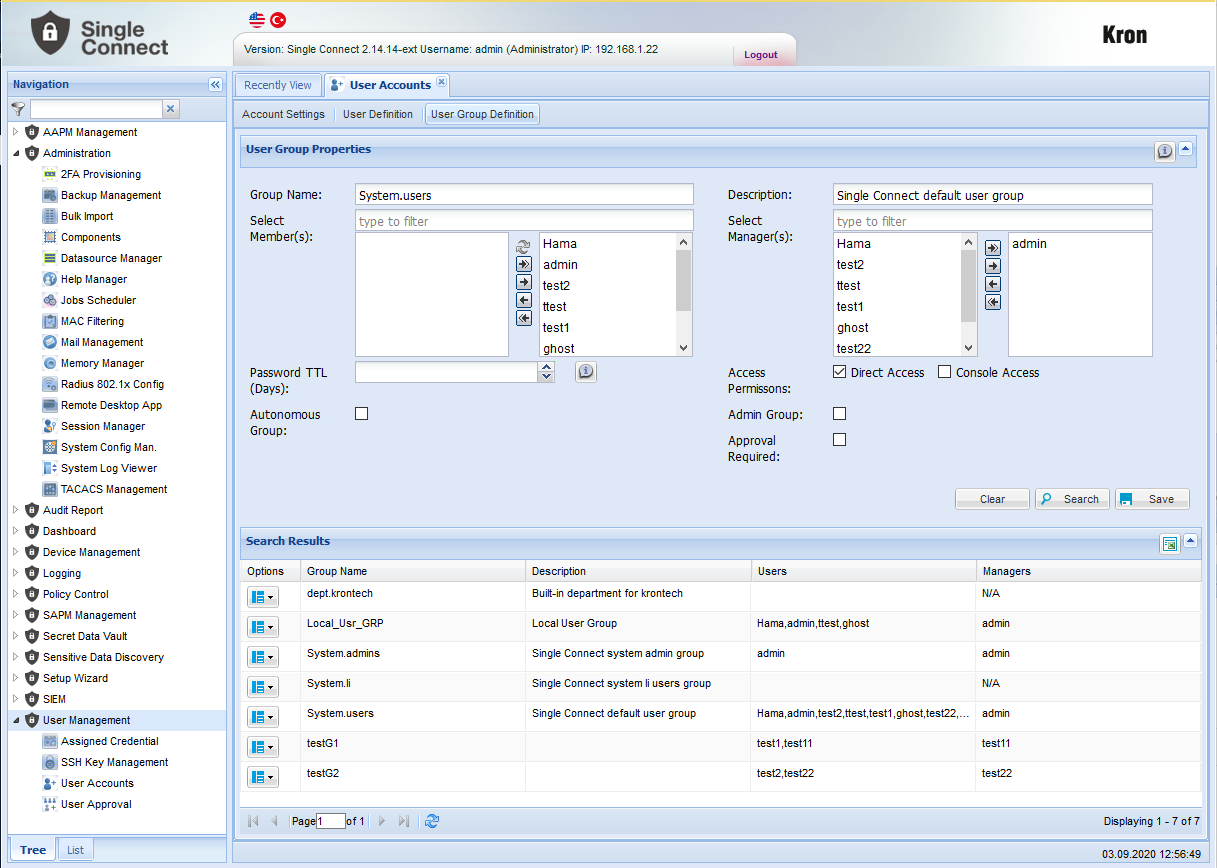
To create a User Group, follow the steps below:
- Log in to the Single Connect Web GUI
- Navigate to User Management > User Accounts
- Open the User Group Definition tab
- Enter the group name and definition
- Select the group users and the group managers
- Select an access permission (none or more than one can be chosen)
- Save to create account
Note |
|---|
Password TTL (Time to live) Day: Defines the maximum time allowed for the use of passwords for users in this group.
|
Editing User Groups
To edit a User Group or to add a member to a group follow the steps below:
- Log in to the Single Connect Web GUI
- Navigate to User Management > User Accounts
- Open the User Group Definition tab
- Enter the group name and Search
- From the Options drop-down menu, click Edit Group, which will show the User Group’s details.
- Select and add additional users or edit group details
- Save
Managerial Approval Definition for User Groups
To define managerial approval rule for members of a user group, check “Approval Required” checkbox in the Edit screen and save the user group.
After saving, all users in the group will need managerial approval when they try to connect a device via RDP or SSH.