Connector - HTTP Proxy Support
This section explains how to establish HTTP Proxy sessions while using a tenant connector.
- A Connector Site is created from the Connector Sites tab on the Tenant Connector screen.
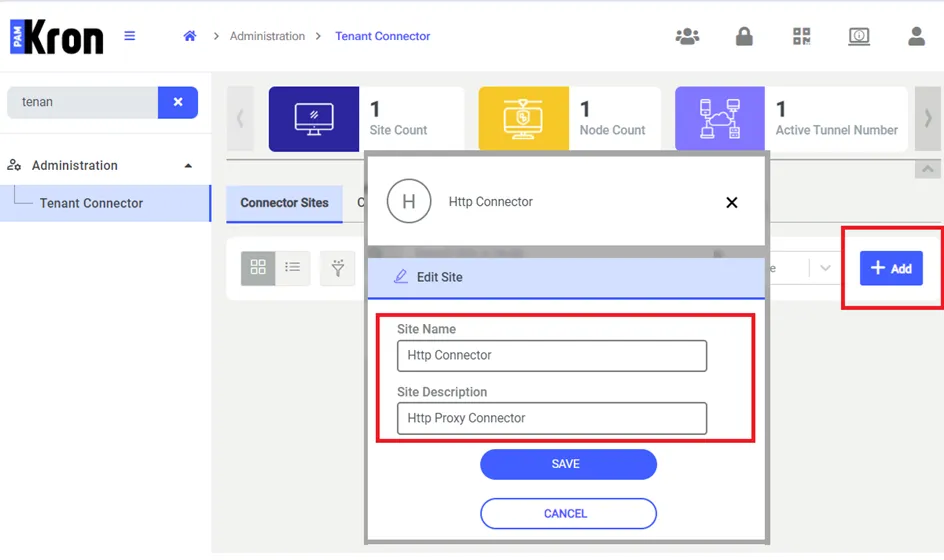
Tenant connector site creation screen
- A node is created with the Outbound or Inbound VPN type from the Connector Nodes tab on the same screen.
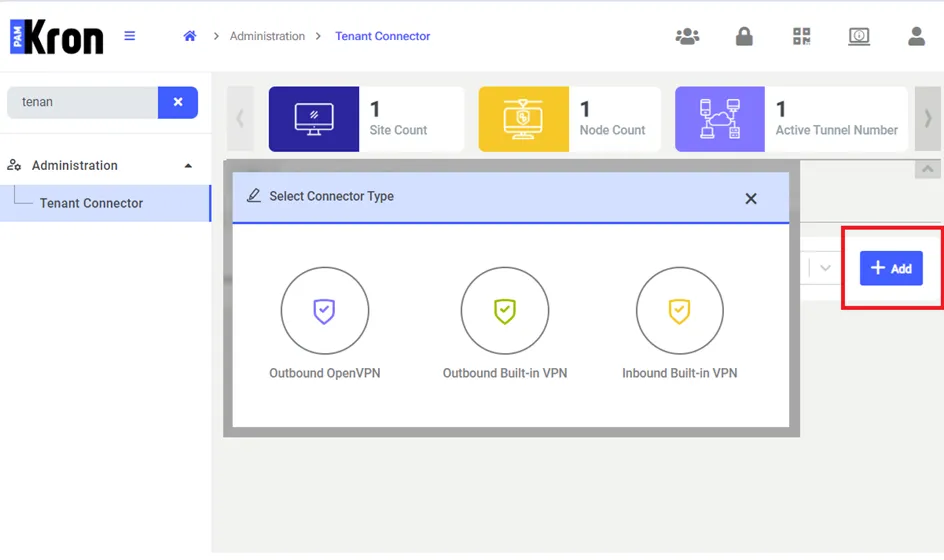
Node Definition Screen
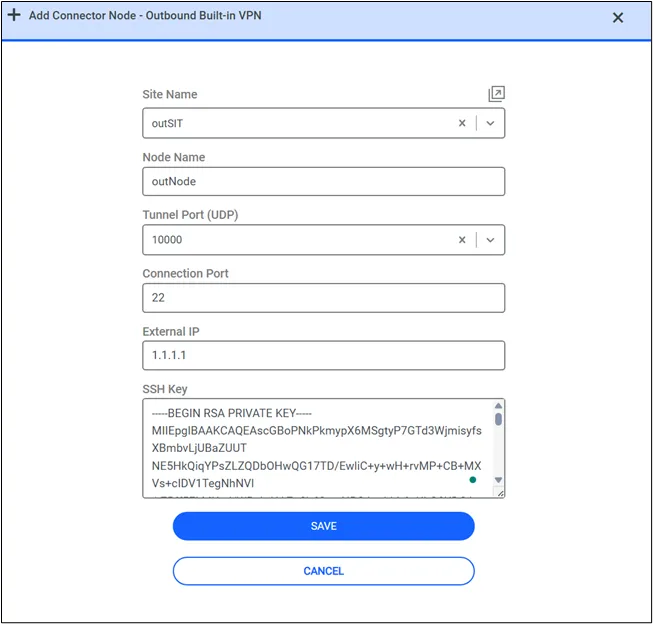
- For Outbound Built-in VPN, the connector configuration settings screen is opened. A site name must be selected, and the username and password values should be entered.
- When the Inbound Built-in VPN button is clicked, the inbound connector settings screen is opened. The Site Name, Node Name, Tunnel Port, and External IP values should be entered. Upon saving the configuration, the connector setup is finalized and ready for use.
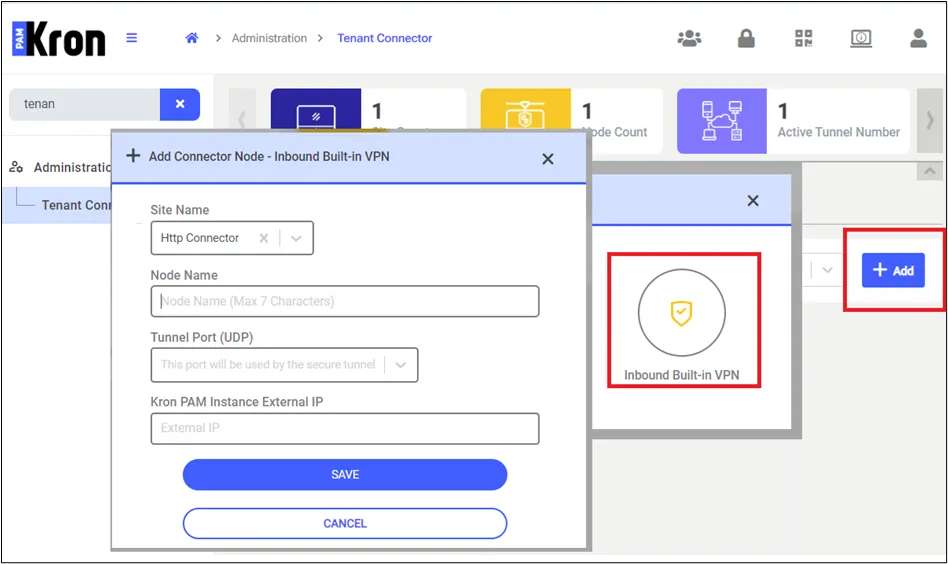
Inbound Built-in VPN node creation screen
- To enable access through the HTTP Proxy using the Connector, the Connector Site Name value must be selected for a relevant device's properties.
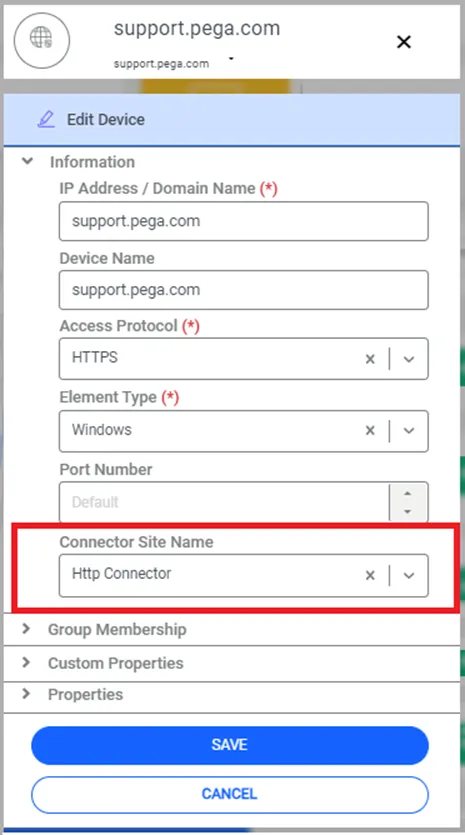
Connector Definion on Device Definition Screen
After completing these configurations, when an internet page is opened for the device through the Kron PAM Desktop Client or via Firefox/Chrome, the connection will be established through the connector.
Whether access to internet sites is made through the connector can also be verified on the HTTP Proxy Logs page.
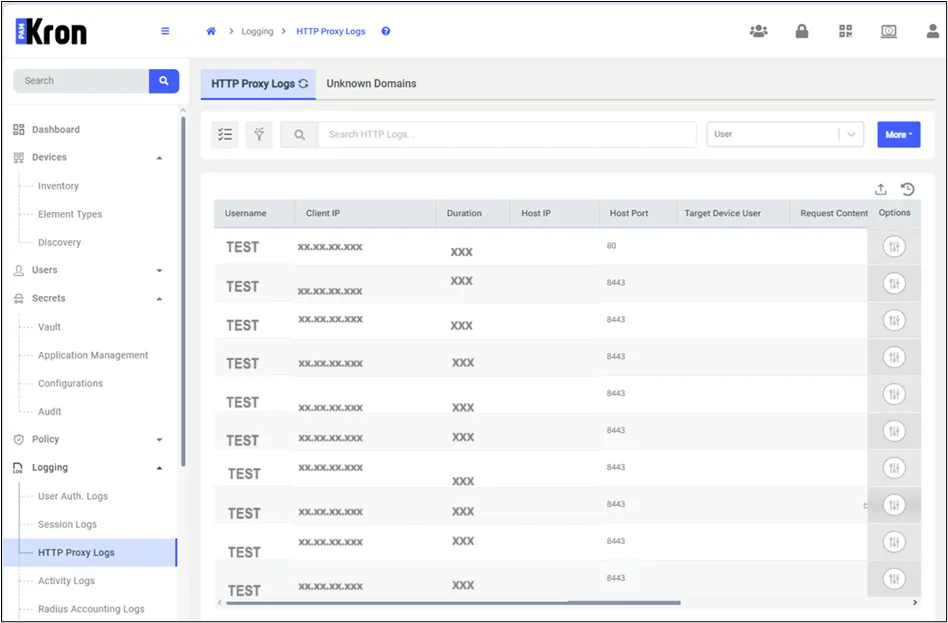
HTTP Proxy Logs