Things to Check if the RPAM Is Not Working
0) (DETAILED LOG MODE) Before you start checking the following steps, enable the detailed log mode ("DEBUG" in application.properties) for the RPAM Portal to collect information related to the requests/responses that are sent to RPAM.
The logging on the portal has the levels ERROR, WARN, INFO, DEBUG, and TRACE. These levels (log.level.remote.access) can be configured in the application.properties file located on the RPAM Portal. The rotation of the log files (log.time.rotation.remote.access) should also be considered to prevent the log file from becoming enormous. The default value of log.level.remote.access is INFO; the default value of log.time.rotation.remote.access is 1 week. Restart pam-rap.service after changing the file.
Example | /pam/remote-access-portal/conf/application.properties ... log.level.remote.access = DEBUG (values: ERROR, WARN, INFO, DEBUG, TRACE) log.time.rotation.remote.access = 1 day (values: 1 day, 1 week, 3 weeks, 1 month) |
|---|
1) Check whether Secure Boot is disabled on both the RPAM Portal machine and the RPAM Connector/Kron PAM Server. If it is enabled, WireGuard might not work.
Linux CLI | [root@portal~]# mokutil --sb-state |
|---|
SOLUTION: Disable Secure Boot.
2) Check the WireGuard configuration files on both the RPAM Portal machine and the RPAM Connector/Kron PAM Server:
Linux CLI | [root@portal~]# cat /etc/wireguard/wg-server.conf |
|---|---|
Example | [root@portal~]# cat /etc/wireguard/wg-server.conf [Interface] PrivateKey = AAAAAAAL/mqg4KKabGXO1GvAmqhFpN3JmJi4A+SE4= ListenPort = 51820 Address = 10.0.0.1/32 [Peer] PublicKey = BBBBBBTqwb8QxlgG0c+RFlol/2eRATmwT7hI/wzjP14= AllowedIPs = 10.0.0.2/32 PersistentKeepalive = 25 |
Linux CLI | [root@connector~]# cat /etc/wireguard/wg-client.conf OR [root@pam~]# cat /etc/wireguard/wg-client.conf |
|---|---|
Example | [root@connector~]# cat /etc/wireguard/wg-client.conf [Interface] PrivateKey = CCCCCCDUnTSCUfUSh3cROM8qnfLnct0XiRUh1RKSV1E= ListenPort = 51820 Address = 10.0.0.2/32 [Peer] PublicKey = DDDDDD9+EPCYlO4RxDaJ6WqPLLK9zVp691BkvZIP/jU= Endpoint = 10.10.10.10:51820 AllowedIPs = 10.0.0.1/32 PersistentKeepalive = 25 |
Ping the RPAM Portal's WireGuard IP address and the RPAM Connector/Kron PAM Server's WireGuard IP address on both environments (you should see that messages are received/sent).
Linux CLI | [root@connector~]# ping {RPAM Portal's WireGuard IP} [root@portal~]# ping {RPAM Connector's/Kron PAM Server's WireGuard IP} |
|---|---|
Example | [root@connector~]# ping 10.0.0.1 [root@portal~]# ping 10.0.0.2 |
SOLUTION-1: Check the WireGuard configurations and restart them.
Linux CLI | [root@portal~]# systemctl restart [email protected] OR [root@connector~]# systemctl restart [email protected] |
|---|
SOLUTION-2: If you still cannot ping, most likely, the firewall at the network level blocks the secure tunnel messaging. Check whether the transfer line shows "0 B received, 0 B sent" after executing the "sudo wg show" command.
If the transfer line has any "0 B" text, use netcat/tcpdump (sudo dnf install nc && sudo dnf install tcpdump) to see whether you can truly send/receive UDP packets to/from the target environment. It is better to check both sides: 1) from the RPAM Connector/Kron PAM Server to the RPAM Portal and 2) from the RPAM Portal to the RPAM Connector/Kron PAM Server.
· Do not rely on messages such as "UDP packet sent successfully" displayed by netcat. In UDP, this message only indicates that the packet was handed off to the local network stack; it does not confirm delivery to the remote host.
· The only reliable way to verify UDP communication is to confirm packet transmission and reception using tcpdump on both ends. If tcpdump doesn't catch the packet, please ask the customer to check their firewall rules at the network level!!!
Side 1:
Linux CLI | [root@portal~]# tcpdump -i any port {UDP Port} [root@connector~]# nc -u -vz {public IP address of RPAM Portal} {UDP Port} |
|---|---|
Example | [root@portal~]# tcpdump -i any port 51820 [root@connector~]# nc -u -vz 12.12.12.12 51820 |
Side 2:
Linux CLI | [root@connector~]# tcpdump -i any port {UDP Port} [root@portal~]# nc -u -vz {public IP address of RPAM Connector} {UDP Port} |
|---|---|
Example | [root@connector~]# tcpdump -i any port 51820 [root@portal~]# nc -u -vz 13.13.13.13 51820 |
SOLUTION-3: Rarely, Deep Packet Inspection (DPI) on the firewall blocks the WireGuard service. Especially if the "netcat-tcpdump" duo works as explained in SOLUTION-2 but the WireGuard transfer value is still 0 B, DPI should be turned off.
Deep Packet Inspection (DPI) is a firewall capability that analyzes the packet payload (Layer 7), not just IP/port (L3/L4). It can identify applications like VPNs (including WireGuard) via signatures/heuristics and enforce policies based on the detected application. DPI is common in next-generation firewalls (NGFW) such as Palo Alto Networks (App-ID), Fortinet FortiGate (Application Control), Check Point (App Control), Cisco Firepower / ASA with FirePOWER, Sophos XG, Juniper SRX, and some cloud NVAs / ISP carrier firewalls. Even if UDP/51820 is allowed, DPI can classify the traffic as wireguard / unknown-vpn and drop or throttle it based on the application policy.
Example | Example of an application-aware allow rule: Source: <connector IP or subnet> Destination: <portal IP> Protocol: UDP Port: 51820 (or chosen port) Application: wireguard / unknown-vpn / any Action: allow Inspection: disable (no DPI / no SSL inspection) |
|---|
3) Check the iptables rules on the RPAM Connector. You need to see at least one iptables rule. The rules are created by the installer, saved to /pam/routing.table, and restored every minute by /pam/restore.routing (cron).
Linux CLI | [root@connector~]# iptables -t nat -nvL |
|---|
SOLUTION: Add the iptables rules on the RPAM Connector manually.
Linux CLI | [root@connector~]# iptables -t nat -A PREROUTING -p tcp --dport {HTTPS port} -j DNAT --to-destination {Kron PAM Server's IP}:{HTTPS port} [root@connector~]# iptables -t nat -A POSTROUTING -p tcp -d {Kron PAM Server's IP} --dport {HTTPS port} -j SNAT --to-source {RPAM Connector's IP} |
|---|---|
Example | [root@connector~]# iptables -t nat -A PREROUTING -p tcp --dport 443 -j DNAT --to-destination 10.20.40.151:443 [root@connector~]# iptables -t nat -A POSTROUTING -p tcp -d 10.20.40.151 --dport 443 -j SNAT --to-source 10.20.40.115 |
4) Check the status of pam-rap.service on the RPAM Portal machine. If it is not working, start it again.
Linux CLI | [root@portal~]# sudo systemctl status pam-rap.service |
|---|
SOLUTION: Restart pam-rap.service.
Linux CLI | [root@portal~]# sudo systemctl restart pam-rap.service |
|---|
5) Check the port allowance at the server level that is defined in the firewalld service. Note that the RPAM Connector and On-PAM installations stop and mask firewalld, while the RPAM Portal installation opens 443/tcp and the WireGuard port (UDP) if firewalld is active:
Linux CLI | [root@portal~]# sudo firewall-cmd --list-ports OR [root@connector~]# sudo firewall-cmd --list-ports OR [root@pam~]# sudo firewall-cmd --list-ports |
|---|
SOLUTION: Stop the firewalld service if it is not needed:
Linux CLI | [root@portal~]# sudo systemctl stop firewalld |
|---|
6) Check the IP routing configuration on both the RPAM Portal and the RPAM Connector/Kron PAM Server. The result should be 1.
Linux CLI | [root@portal~]# sysctl net.ipv4.ip_forward [root@connector~]# sysctl net.ipv4.ip_forward |
|---|
SOLUTION: If it is 0, enable IP routing by setting it to 1:
Linux CLI | [root@portal~]# sysctl -w net.ipv4.ip_forward=1 |
|---|
7) Check the SELinux security mode. The result should be permissive.
Linux CLI | [root@portal~]# getenforce |
|---|
SOLUTION: If the result is Enforcing, select the permissive security mode with these commands:
Linux CLI | [root@portal~]# setenforce 0 [root@portal~]# setsebool -P httpd_can_network_connect on |
|---|
8) Check the portal rights of the users if the SSH/RDP session over the RPAM Portal comes with a blank or undefined@undefined page.
SOLUTION: Give these portal rights to the users through user groups: single.connect.rdp.client.moduleVisibility, single.connect.cli.moduleVisibility
9) In Kron PAM 3.8.0 or previous versions, the RPAM Portal might repeatedly show a 403 error with the "The remote access time given to you has expired!!!" message to the user. This is because the target user is an OTP-enabled user.
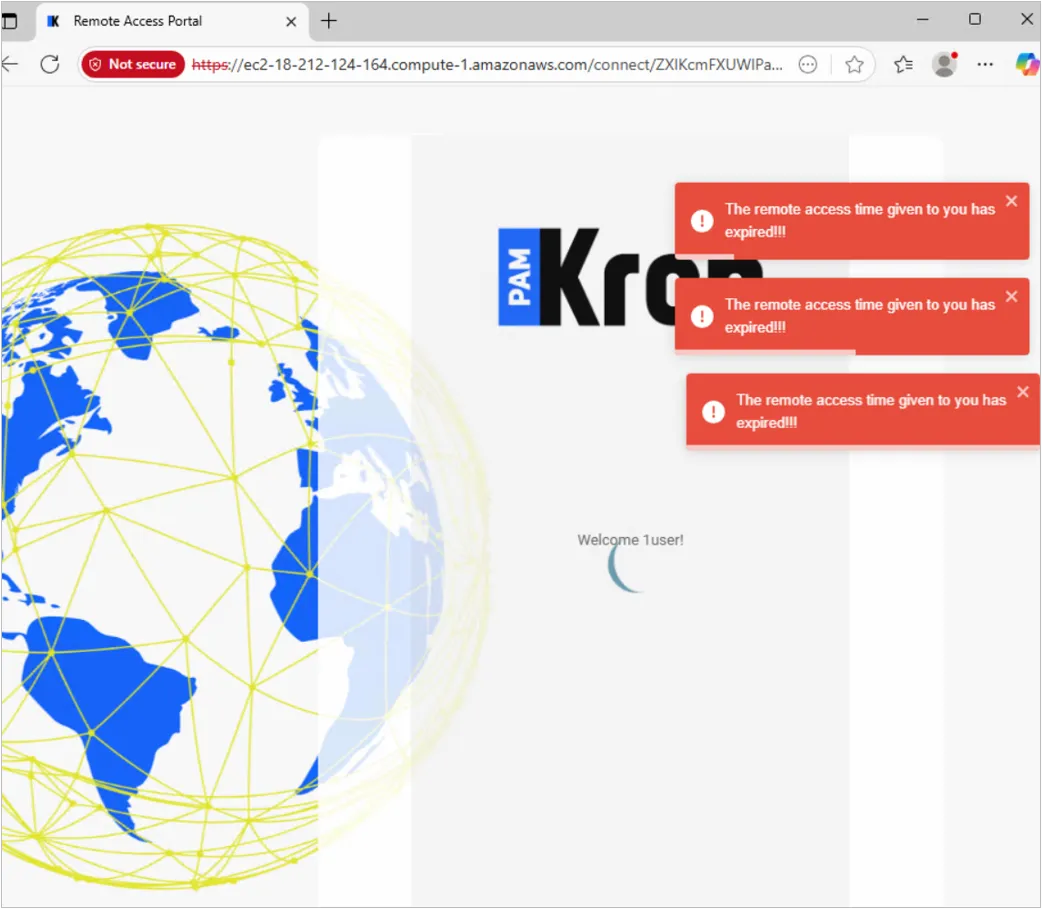
SOLUTION: EITHER update the Kron PAM/RPAM Portal version to 3.8.1 or above, OR disable OTP for the target user.
10) Check the nginx configuration file under /etc/nginx/nginx.conf on the RPAM Portal. Check the server info in the upstream backend section of nginx.conf and the activeness of nginx.service.
Linux CLI | [root@portal~]# cat /etc/nginx/nginx.conf ... upstream backend { server {RPAM Connector's WireGuard IP}:443; } ... |
|---|---|
Example | upstream backend { server 10.0.0.2:443; } |
SOLUTION: If nginx.service is not working, restart it on the RPAM Portal machine.
Linux CLI | [root@portal~]# sudo systemctl restart nginx.service |
|---|
11) If the RPAM link returns a 404 HTTP error, check whether the correct nginx configuration file is used under /etc/nginx/nginx.conf on the RPAM Portal machine. For Kron PAM 3.9.0, the file should have the following block (for 3.8.x and earlier, the path is /rap-ui/static instead of /rpam-ui/static):
Linux CLI | [root@portal~]# cat /etc/nginx/nginx.conf ... location /rpam-ui/static { proxy_set_header X-Forwarded-For $remote_addr; real_ip_header X-Forwarded-For; proxy_pass http://127.0.0.1:7777/static; } ... |
|---|
SOLUTION: Make sure that the RPAM Portal was installed with the correct Target Kron PAM version, since the installer selects the nginx template according to this version. If the block is missing, add it into the nginx.conf file on the RPAM Portal machine and save the file. After that, restart nginx.service (sudo systemctl restart nginx.service).
12) If the RPAM links get a certificate error, check whether the self-signed certificate and generic RSA private key have been replaced with the customer's own certificate and RSA private key (see RPAM Portal Installation).
SOLUTION: If the customer has its own certificate and RSA private key, put these files under /etc/nginx/certs with the names cert.crt and cert.key. After that, restart nginx.service (sudo systemctl restart nginx.service).
13) If you face the error "RAP- REQUST NOT FOUND: request with id {no} could not be found" on the RPAM Portal GUI, check the CORS configuration on the Kron PAM Server (for both the with-RPAM-Connector and without-RPAM-Connector scenarios):
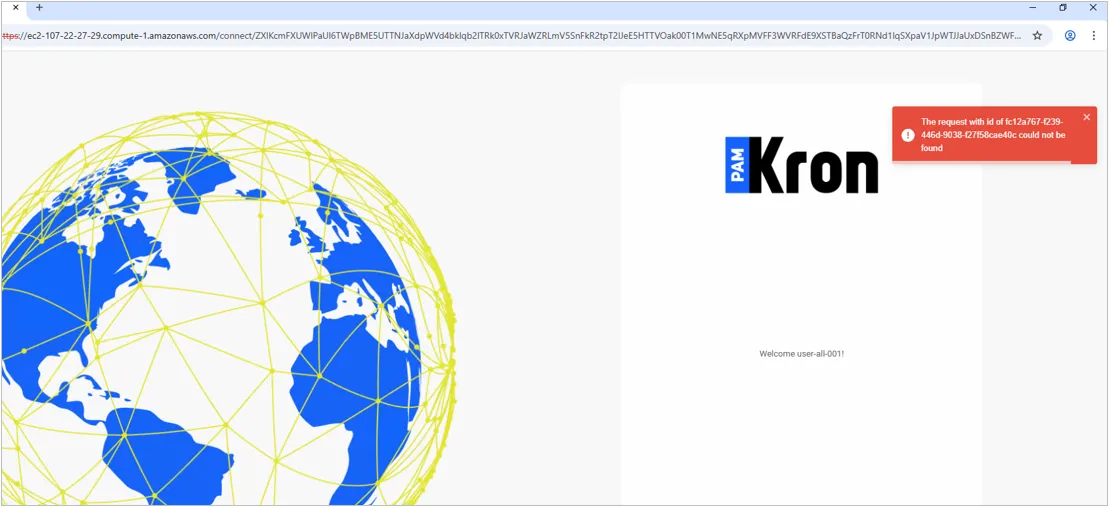
SOLUTION-1: Add {Portal URL} as the cors.allowed.origins parameter under /pam/gui/conf/web.xml (see Kron PAM Server Configuration).
SOLUTION-2: Set the users to have at least the portal functions listed in Kron PAM Server Configuration.
14) (IP/Domain Name) Check the IP/domain name information on both the RPAM Portal and the Kron PAM Server. The installer writes the RPAM Portal hostname/DNS value entered during the installation to sc.server in application.properties and adds an /etc/hosts entry for it automatically; check these values if they were entered wrongly or have changed afterwards.
SOLUTION: Use the correct values on the RPAM Portal and the Kron PAM Server.
14.1) If the IP address is used in the RPAM links:
On the RPAM Portal:
Linux CLI | [root@portal~]# vi /etc/hosts {private IP of the RPAM Portal} {public IP of the RPAM Portal} [root@portal~]# vi /pam/remote-access-portal/conf/application.properties sc.server={private IP of the RPAM Portal} |
|---|---|
Example | 10.10.10.10 204.232.204.232 sc.server=https://10.10.10.10 |
On the Kron PAM Server: System Config Man. → rap.cloud.server = {public IP of the RPAM Portal + /connect}, e.g., https://204.232.204.232/connect
14.2) If the domain name is used in the RPAM links:
On the RPAM Portal:
Linux CLI | [root@portal~]# vi /etc/hosts {private IP of the RPAM Portal} {URL of the RPAM Portal} [root@portal~]# vi /pam/remote-access-portal/conf/application.properties sc.server={URL of the RPAM Portal} |
|---|---|
Example | 10.10.10.10 remote.testcloudpam.com sc.server=https://remote.testcloudpam.com |
On the Kron PAM Server: System Config Man. → rap.cloud.server = {URL of the RPAM Portal + /connect}, e.g., https://remote.testcloudpam.com/connect
15) Check the RPAM Portal's service log on the RPAM Portal.
SOLUTION: Check the recent log lines to see if there are any errors.
Linux CLI | [root@portal~]# tail -1000f /pam/remote-access-portal/logs/application.log |
|---|
16) Check catalina.out and localhost_access_log.{YEAR-MONTH-DAY}.txt under /pam/gui/logs on the Kron PAM Server during the session opened on the RPAM Portal.
SOLUTION: Check the recent log lines to see if there are any errors.
Linux CLI | [root@pam~]# tail -1000f /pam/gui/logs/catalina.out [root@pam~]# tail -1000f /pam/gui/logs/localhost_access_log.{YEAR-MONTH-DAY}.txt |
|---|---|
Example | [root@pam~]# tail -1000f /pam/gui/logs/localhost_access_log.2026-10-21.txt |