DSP Pipeline UI Configuration
Source Configuration
Fluent Configuration
It’s assumed that fluent is configured on the hosts to send logs to the Kron DSP on designated port since this port will be used in source configuration.
- Login to UI with admin credentials.
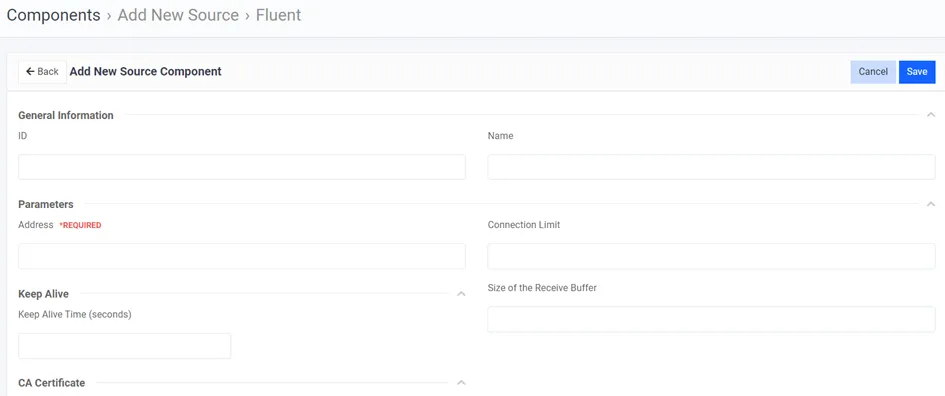
- Navigate to Components. Available source types will be listed.
- Click on Fluent source type.
- Fill in the required information.
- Name/ID field should be unique since it will be recalled in pipeline configuration tab.
- For address field it is the socket address to listen for connections on DSP instance, if a socket address is used, it must include a port. Example: “0.0.0.0:9000”.
- Fill the TLS configuration if necessary. Click save.
- Each added source can be reconfigured again from the Inventory menu for later editing. Navigate to inventory section from the mail menu and click on the added source name to edit it.
Syslog Configuration
- Login to UI with admin credentials.
- Navigate to Components. Available source types will be listed.
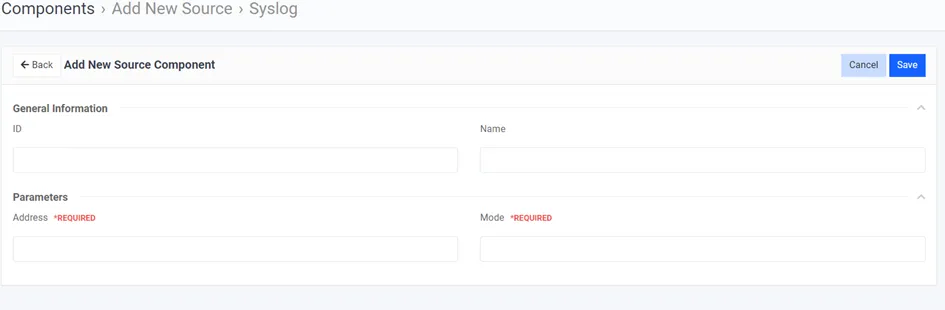
- Click on Syslog source type.
- Fill in the required information.
- Name/ID field should be unique since it will be recalled in pipeline configuration tab.
- For address field it is the socket address to listen for connections on, if a socket address is used, it must include a port. Example: “0.0.0.0:9000”.
- Fill the TLS configuration if necessary.Click save.
- Each added source can be reconfigured again from the Inventory menu for later editing. Navigate to inventory section from the mail menu and click on the added source name to edit it.
Socket Configuration
- Login to UI with admin credentials.
- Navigate to Components.
- Available source types will be listed.
- Click on Socket source type.
- Fill in the required information.
- Name/ID field should be unique since it will be recalled in pipeline configuration tab.
- For address field it is the socket address to listen for connections on, if a socket address is used, it must include a port. Example: “0.0.0.0:9000”.
- Fill the TLS configuration if necessary. Click save.
- Each added source can be reconfigured again from the Inventory menu for later editing. Navigate to inventory section from the mail menu and click on the added source name to edit it.
Destination Configuration
AWS S3 Configuration Example
- Login to UI with admin credentials.
- Navigate to Components. Click on Destination. Available Destination Types will be listed.
- Fill in the required information.
- Name/ID field should be unique since it will be recalled in pipeline configuration tab.
- Enter bucket name. Example: "test-bucket-kron"
- Enter Region. Example: "eu-central-1
- Enter a key_prefix. Example "%Y/%-m/%-d/aws_full/$parametric_log_value" here for this value "$parametric_log_value" a tags field can be written. Lets say a log contains the "IP:xxx" tag then if IP is written for this parameter. Files will be splitted according to device IP's.
- Enter filename_append_uuid. Example:false/true add random uuid for filename
- Enter filename_time_format. Example: "%F-%s"
- Enter access_key_id. Example: "AKIAZXXXXXXXPFVXM"
- Enter secret_access_key. Example: "fwDczHGXXXXXXXXXEgiwfTJlDOS"
- Select codec format. Examples: "json" or "text"
- Select batch file sending timeout secs. Example: "360"
- Fill the TLS configuration if necessary. Click save.
- Each added destination can be reconfigured again from the Inventory menu for later editing. Navigate to inventory section from the mail menu and click on the added source name to edit it.
Adding a Pipeline
- Navigate to “Pipelines” from the main menu.
- From the top right corner click on the add pipeline.
- Enter a name for the Pipeline.
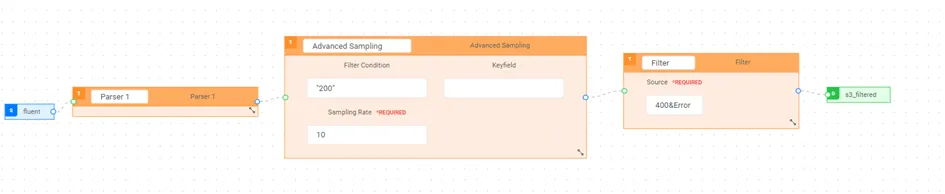
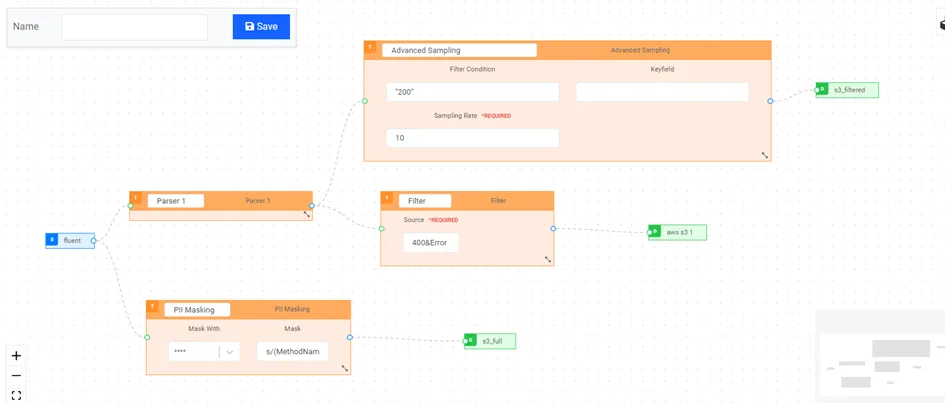
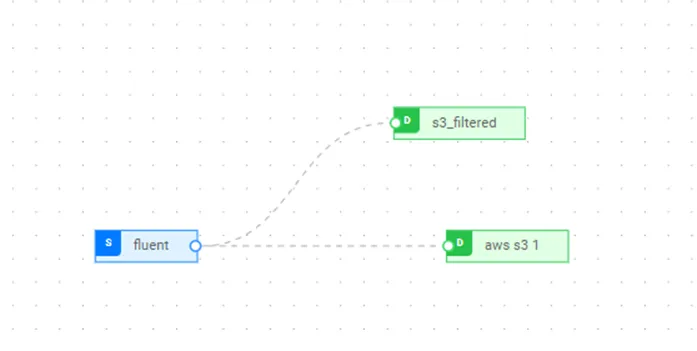
- This screen is built with drag-and-drop features, but first, the components that will be used must be selected. From the top right corner, there is an option for adding nodes. When clicked, a pop-up screen will appear. These nodes are grouped as sinks, destinations, and transform types. Created sinks and sources will be listed in related tabs. There is no limit to the number of nodes that can be selected. Transform types contain parsers and transform functions. If transform functions are going to be applied to the logs coming from a source, it is crucial that, right after a source, a parser must be linked before linking other transform functions such as sampling, filtering, or tagging. First, a source will be linked to a parser. Then, from that parser, transform functions can be added back-to-back symbolizing the downstream. There could be any number of transform functions between a source and destination. Transform functions can be linked to each other. However, after the last transform function, there must be a destination so that logs can be shipped to the correct place without getting lost, this scenario refers to the Figure 3. Outputs of sources and transforms can be replicated so that logs coming from the same source can be shipped to many destinations. To do this on the UI, just link a source or a transform's output to more than one transform or destination, this scenario refers to the Figure 4. Also, it’s an option to directly link a source to a sink without having any parser or transform functions to ship full-fidelity data to the destination, this scenario refers to the Figure 5.