Scheduling Reports
Any Dashboards or Charts that are created from the Report Designer can be scheduled to run periodically from Report Schedule section of Kron PAM:
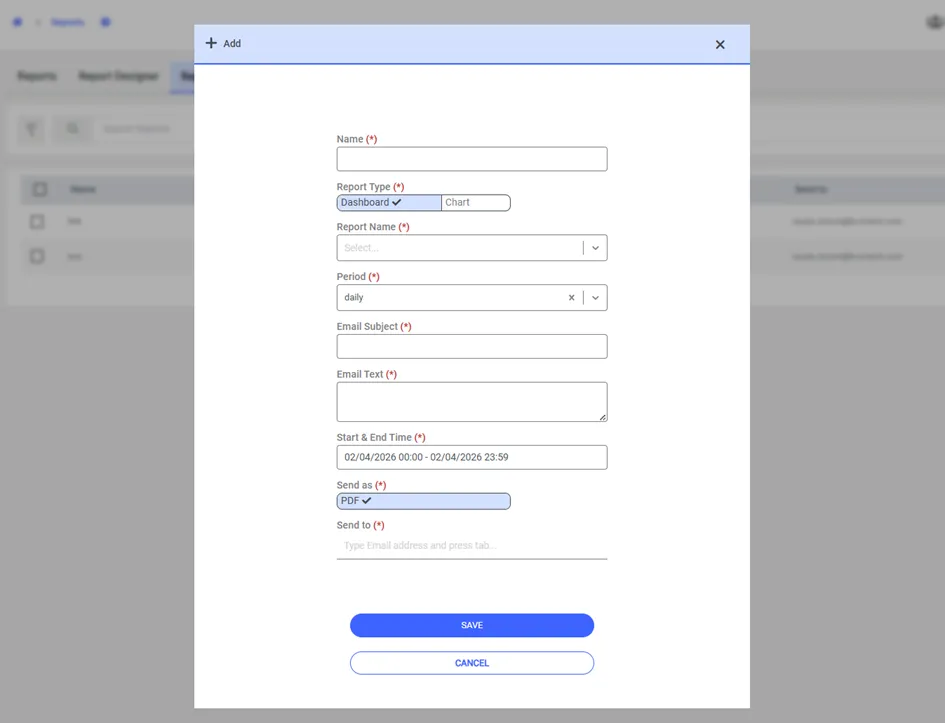
1. Navigate to Reports > Report Schedule
2. Click the Add button to add a new schedule. From the menu appeared, add the following fields and click Save.
· Name – Enter the name for the scheduled report.
· Report Type – Select Dashboard or Chart to schedule dashboards or charts.
· Report Name – Select the Dashboard or Chart to be scheduled.
· Send as – (appears only when Report Type is selected as Chart) Select the format, CSV or XLSX.
· Start Date – Select the Start Date for the scheduled reports to start.
· End Date – Select the checkbox to enable an End Date for the reports to End. Select the End Date after clicking the checkbox.
· Period – Select the frequency of the report to be sent, hourly, weekly, daily or monthly.
· Email Subject – Enter the subject of the emails to be sent.
· Email Text – Enter the body text for the emails to be sent.
· Send to – Enter the Email addresses for the reports to be sent.
Once the scheduled report is added, it can be found in the list.