PAM Update Guide
This step-by-step guide for updating Kron PAM introduces the web-based update wizard: launch & mode selection, welcome checks, update type selection, review, confirmation, progress tracking, live logs, and reboot flow.
Before You Start
Connect to the server with the pamuser account and go to the directory where the update package is located. Extract the archive with the tar command, then start the launcher script with sudo.
[pamuser@btu-pam-tester: /update_packages]# tar -xvf kron-pam-3.9.0-a1-update.tar

[pamuser@btu-pam-tester: /update_packages]# ls -lh
drwx------. 4 pamuser pam-group         63 2026-06-03 04:21 3.9.0-update
-rwx------. 1 pamuser pamuser          118 2026-06-03 04:21 3.9.0-update.sh
-rw-r--r--. 1 pamuser pamuser   4495181500 2026-06-03 04:10 kron-pam-3.9.0-a1-update.tar

[pamuser@btu-pam-tester: /update_packages]# sudo ./3.9.0-update.sh
Mode Selection — WEB or CLI
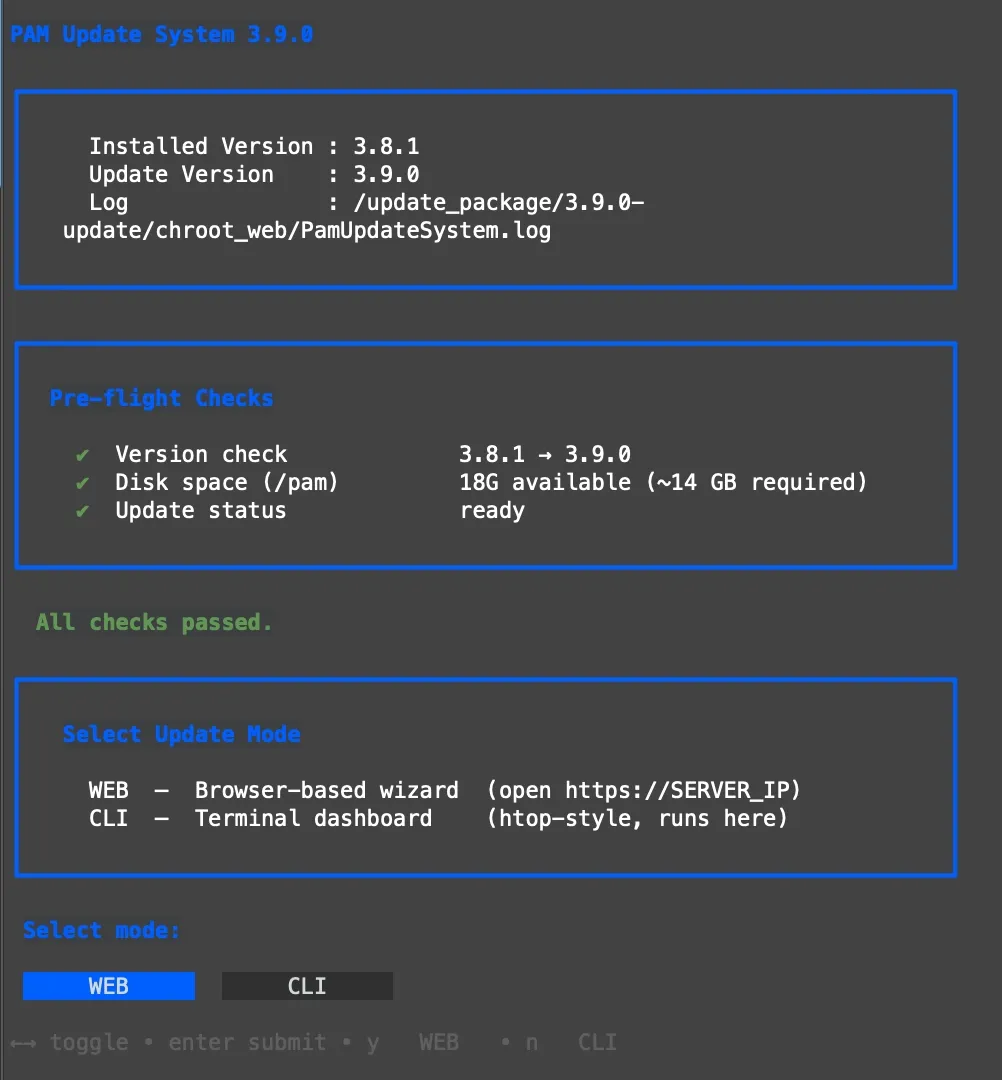
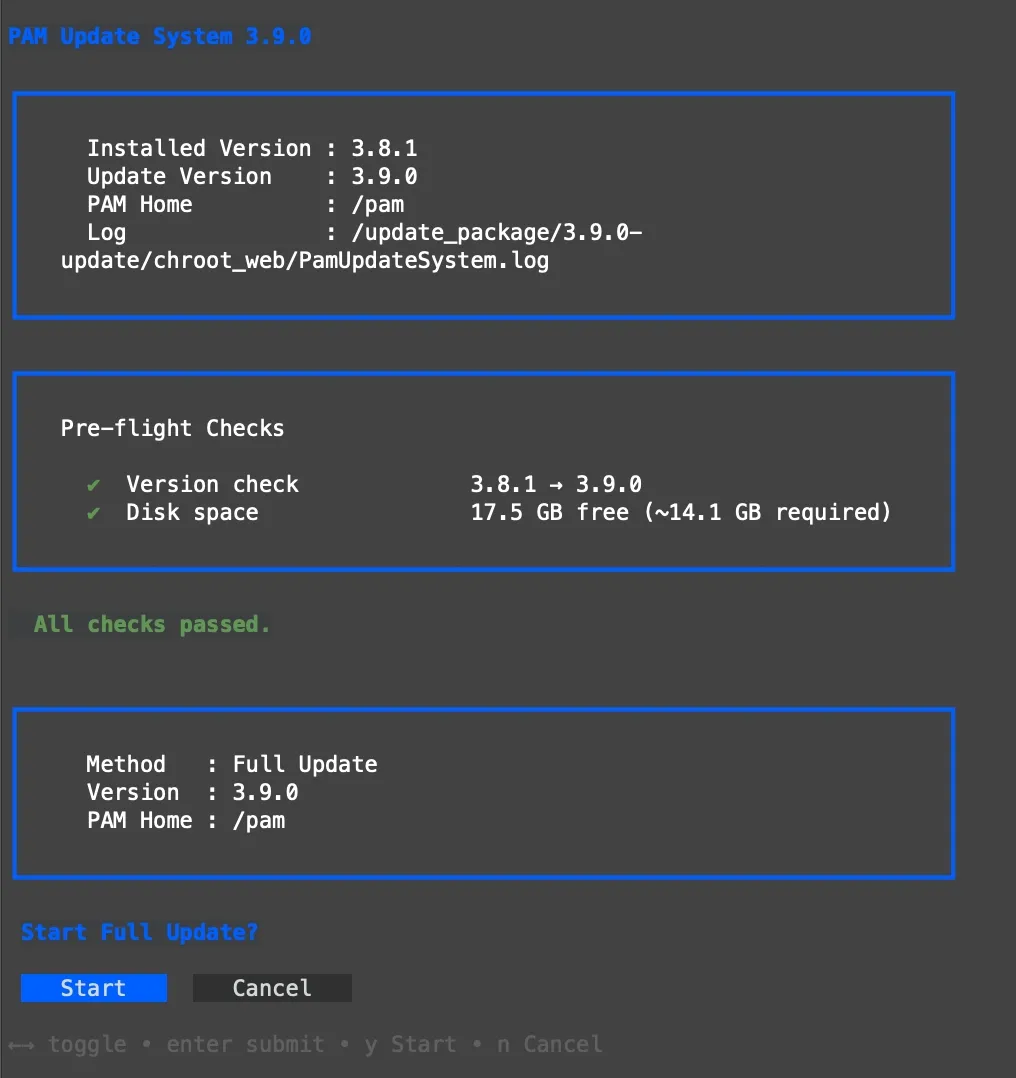
After the launcher runs pre-flight checks, a mode selection prompt appears. Select WEB to start the browser-based wizard described in this guide. The CLI option opens a terminal dashboard instead.
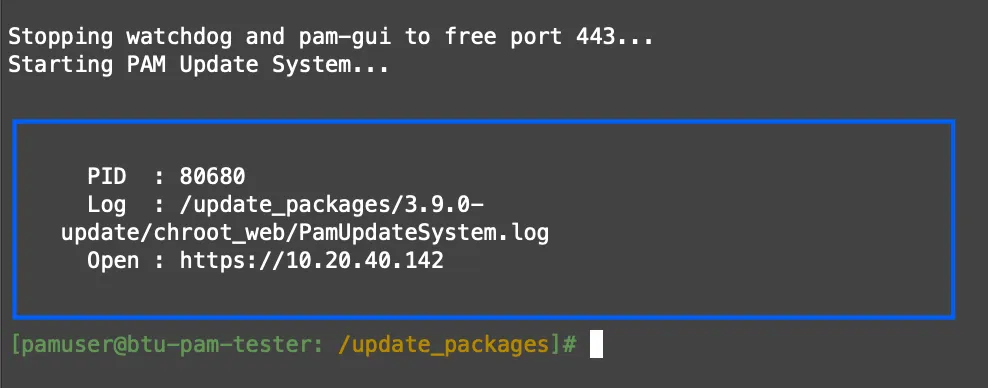
After WEB is selected, the launcher stops PAM services and starts the update web server. The browser URL, IP address, and port are printed to the terminal. Open that address in a browser to continue.
If the browser connection is lost during the update, reopen the same URL. The page reconnects to the current update state automatically. The update process does not restart from the beginning.
Step 1 — Welcome Screen
The Welcome screen is the first step of the PAM update wizard. A horizontal stepper at the top shows the complete update flow, and the active step is highlighted in blue.
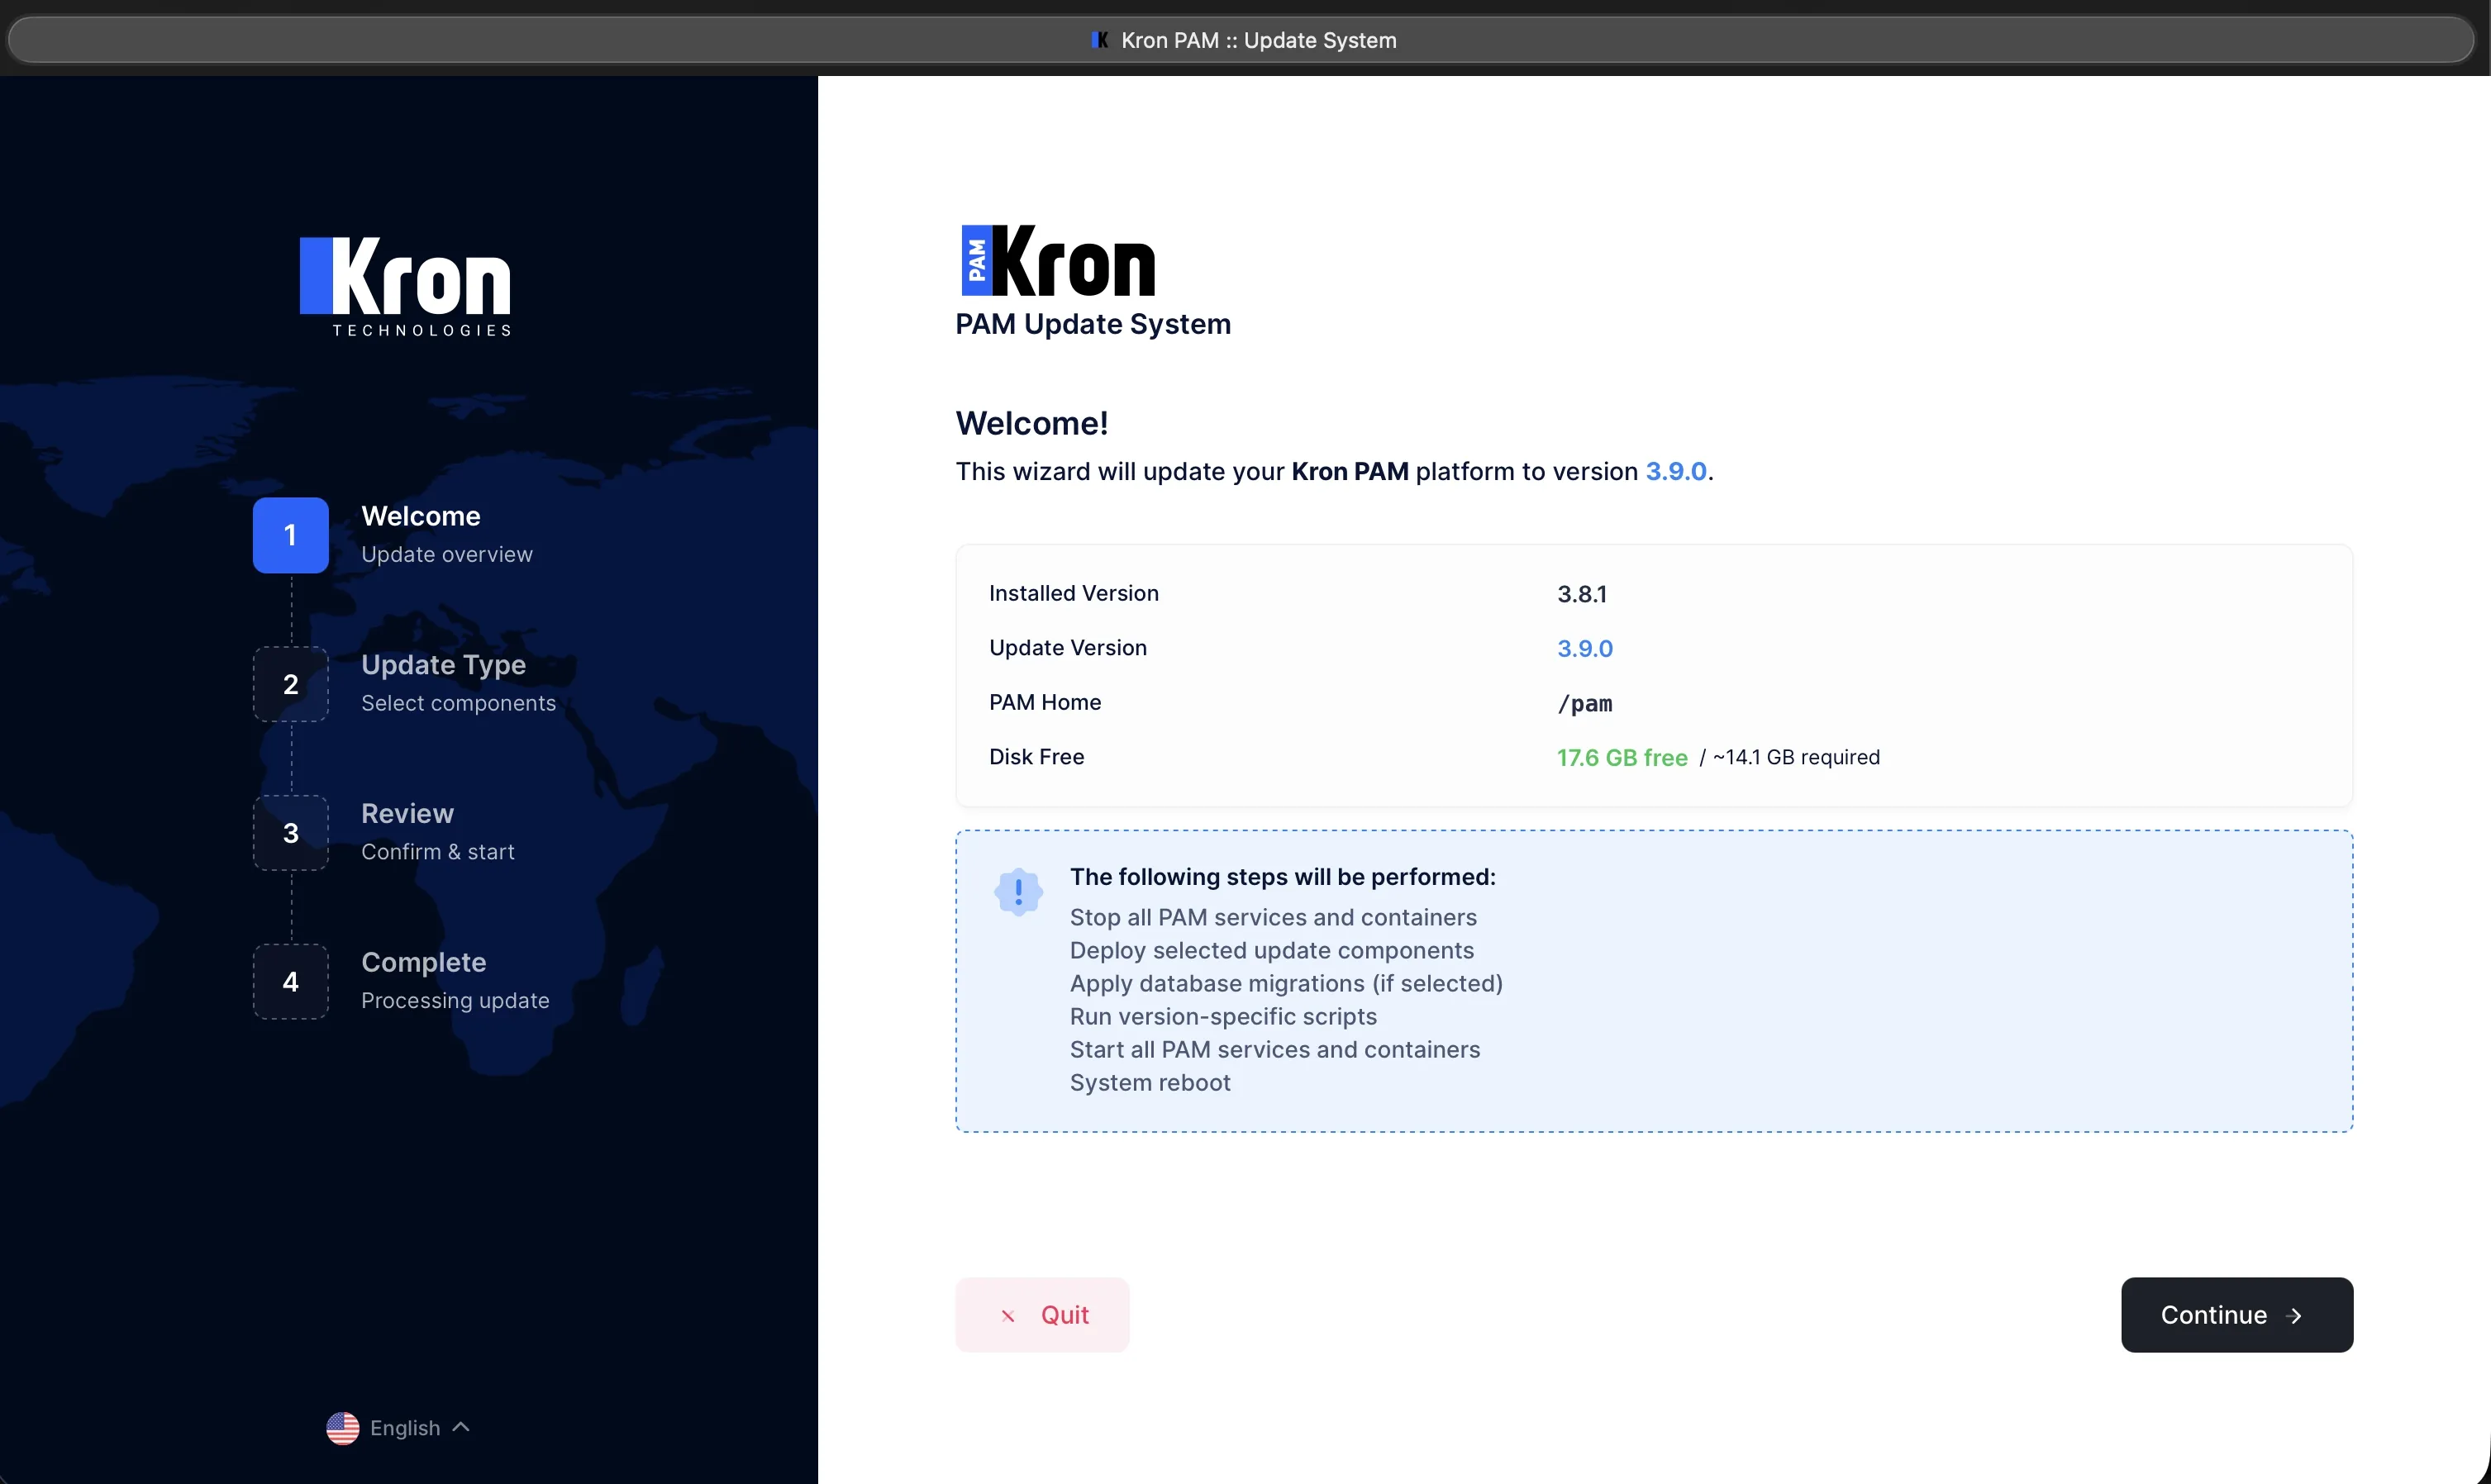
Information card
Field | Description |
|---|---|
Installed Version | Current PAM version installed on the server. |
Update Version | Target version to be installed. Highlighted in blue. |
PAM Home | PAM installation directory on the server. |
Disk Free | Available and total disk size. Green means enough space; red indicates low disk space. |
What happens during update
- The wizard stops all PAM services and containers.
- Selected update components are installed.
- Database migrations are applied if selected.
- Version-specific scripts are executed.
- All PAM services and containers are restarted.
- The system is rebooted automatically.
If all information is correct, click Continue in the lower-right corner. The interface supports 10 languages; use the flag selector in the upper-right corner to change it.
Step 2 — Select Update Type
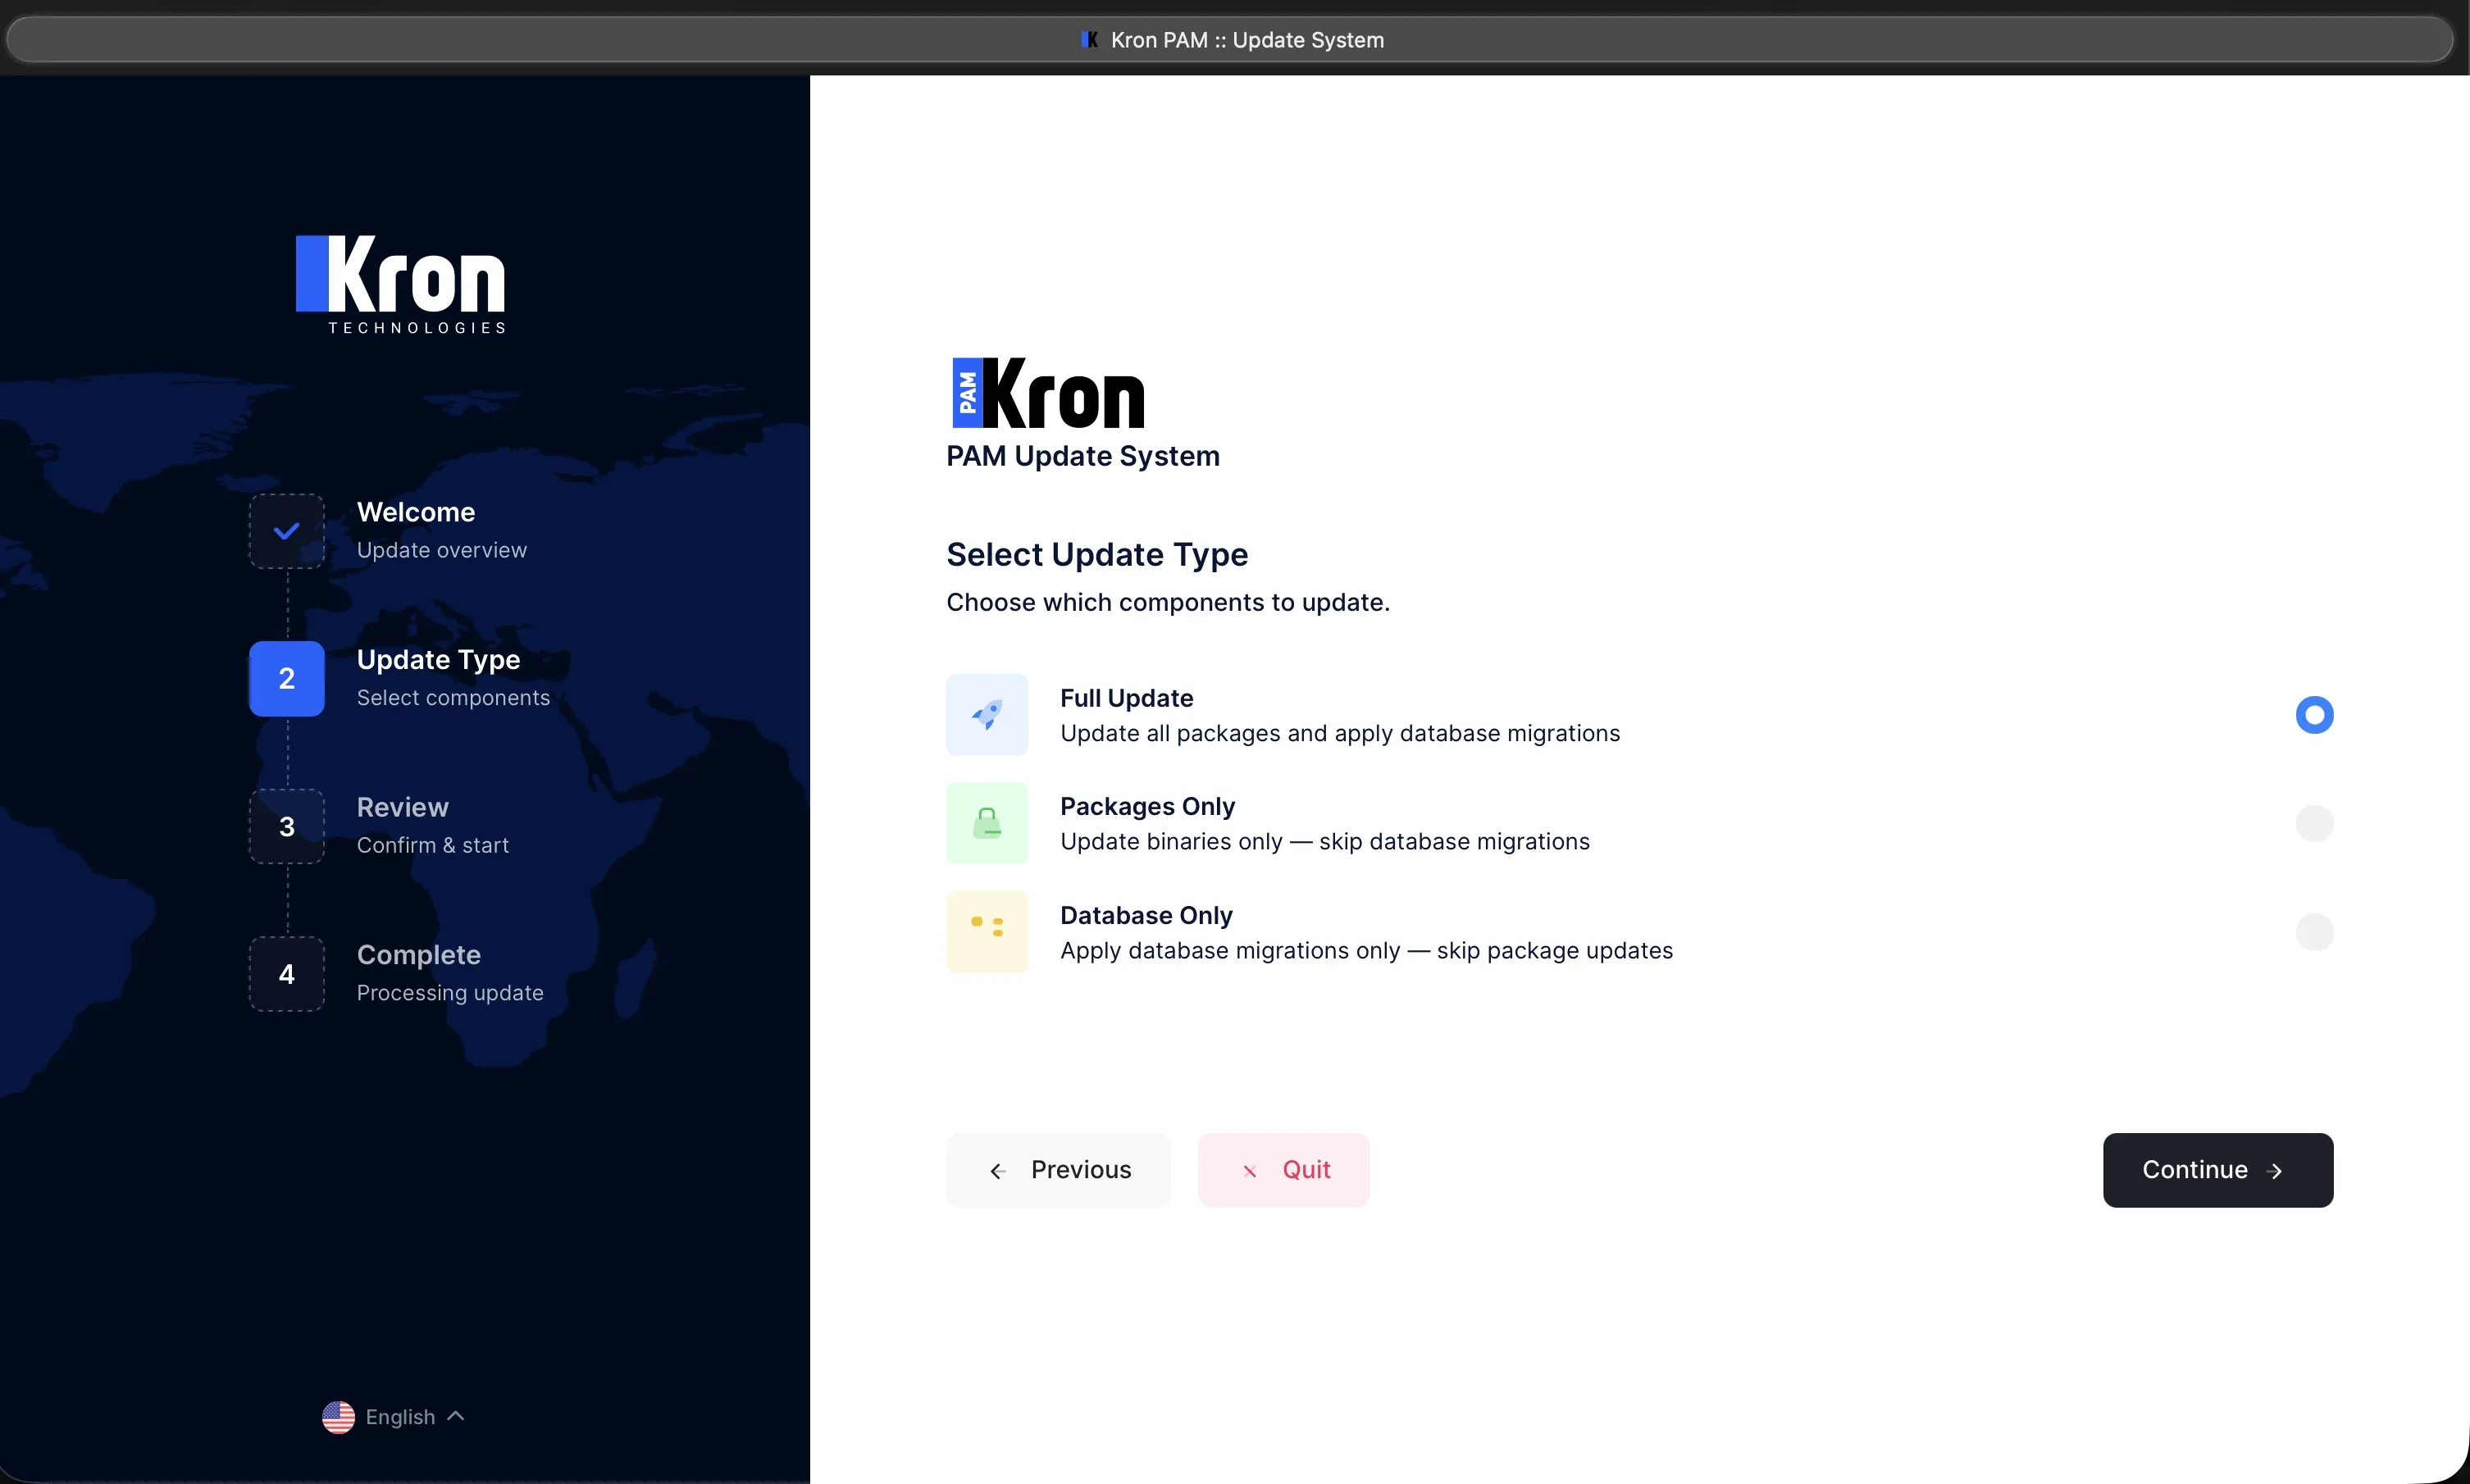
Select one of three update types. For a standard routine update, keep Full Update selected and click Continue.
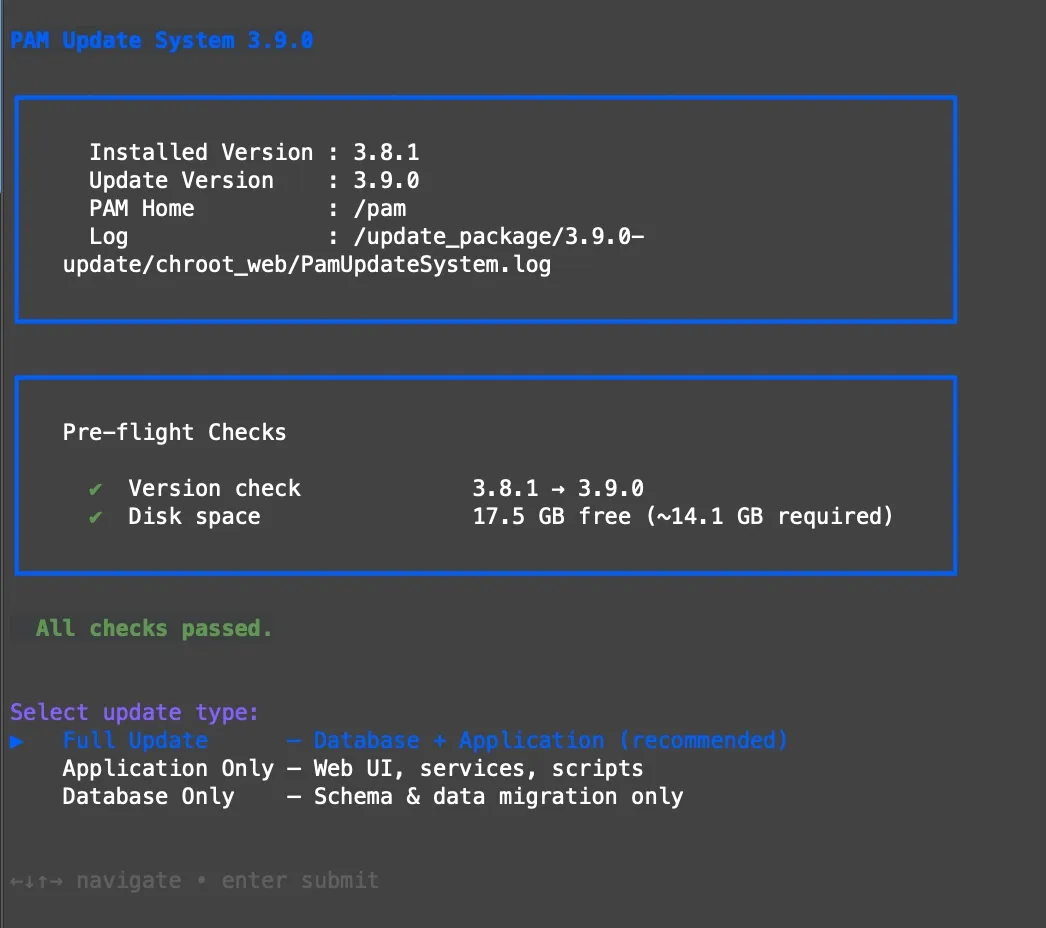
Option | What it does | When to use |
|---|---|---|
Full Update | Updates all packages and applies database migrations. | Recommended for most routine version updates. |
Packages Only | Updates only application binaries; skips database migrations. | Use when only application files need to be replaced. |
Database Only | Applies only database migrations; skips package update. | Use if packages are already installed but database migration was not completed. |
Step 3 — Review
The Review screen lets you verify all selections before starting the update. No input is required; confirm that the information is correct, then click Continue.
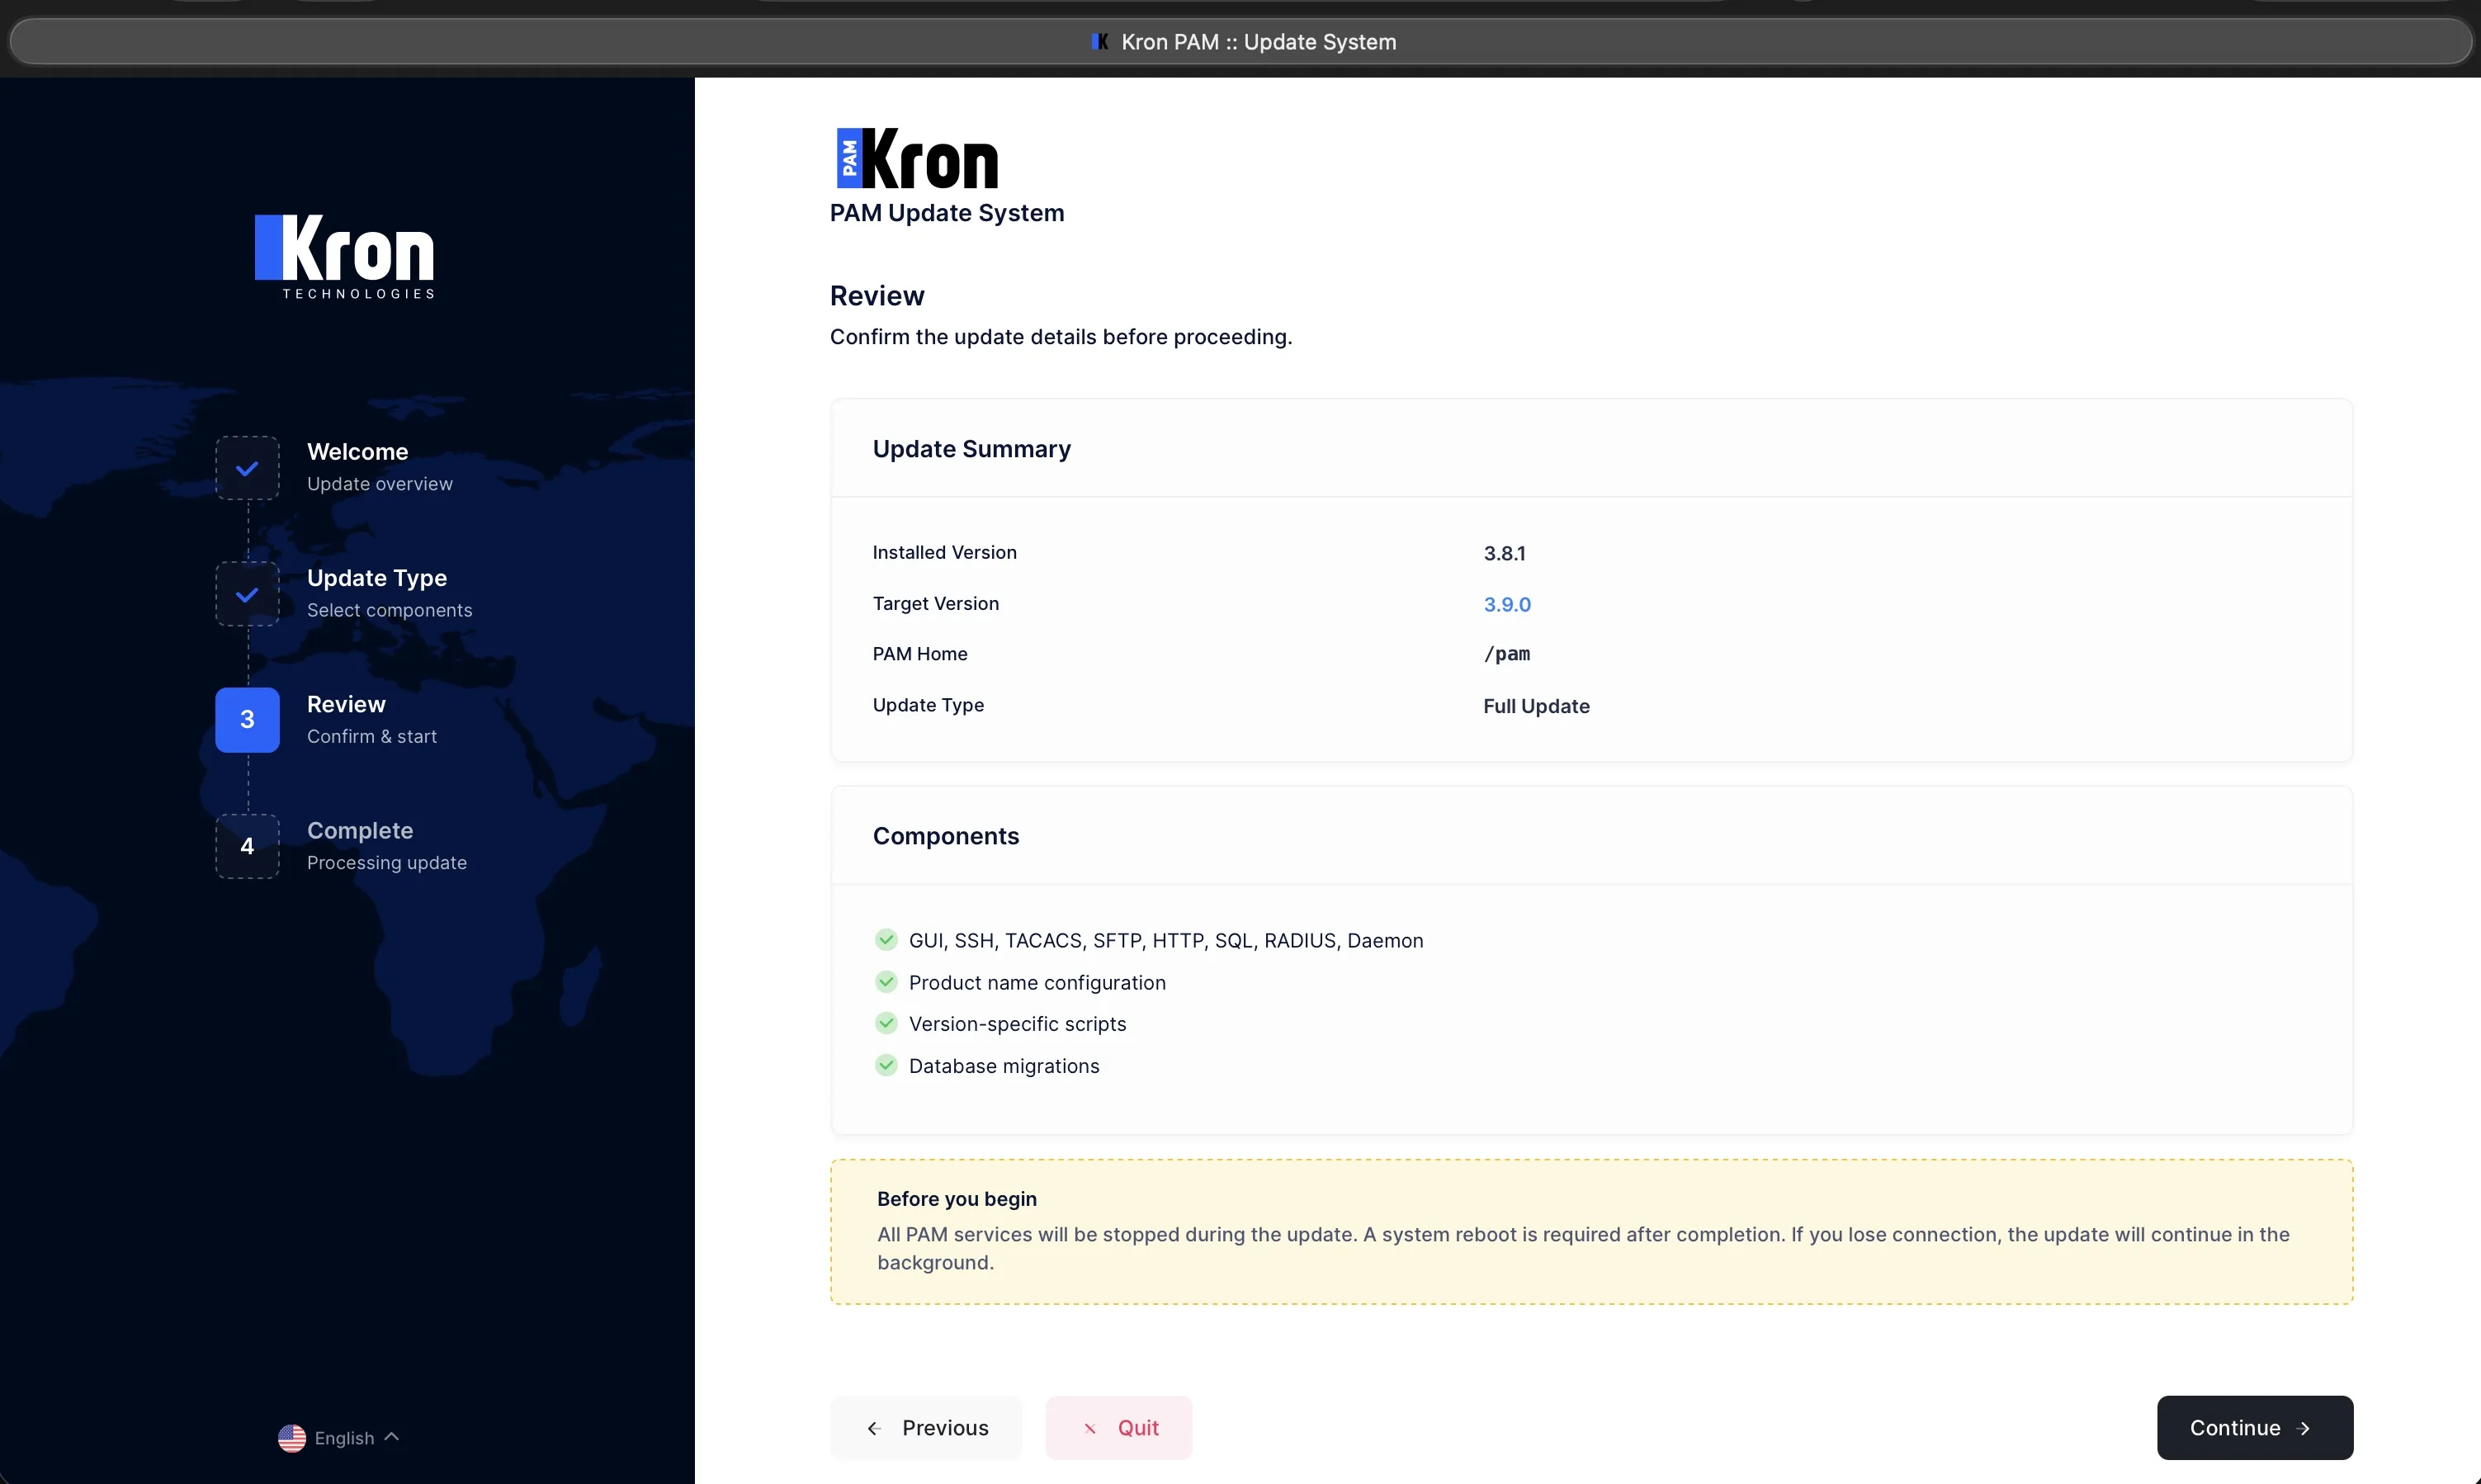
Update Summary
- Installed Version
- Target Version
- PAM Home
- Selected Update Type
Components
- GUI, SSH, TACACS, SFTP, HTTP, SQL, RADIUS, Daemon packages
- Product name configuration
- Version-specific scripts
- Database migrations, if selected
During the update, all PAM services are stopped. After completion, the system reboots automatically. If the connection is lost, reopen the page to reconnect; the update continues in the background.
Step 4 — Confirm / Ready to Update
This is the final confirmation screen before the update starts. It shows the target version and a version transition badge. When ready, click Start Update.

What will happen
- All PAM services will be stopped.
- Application packages and database will be updated.
- Services will restart automatically.
- The system will reboot automatically after completion.
Important: After clicking Start Update, the update begins and cannot be rolled back from the wizard.
Step 5 — Progress Panel
After the update starts, the wizard steps disappear and the Progress Panel is shown. The panel displays the active update state, animated informational messages, step list, system metrics, and log controls.

Step List
Stages such as Stop Services, GUI, Database, Scripts, and Start Services are listed with elapsed time. Completed steps show a green check mark; the active step shows a spinner.
Metrics & Controls
- CPU, RAM, Disk, and I/O usage are shown live.
- View Log opens the full-screen log viewer.
- Download Log becomes active after completion.
When the update completes, a green Reboot Required banner appears on the same page. A countdown starts automatically. Click Reboot System Now to reboot immediately, or wait for the countdown to finish.
Step 6 — Full-Screen Update Log
The full-screen terminal-style log view opens when the user clicks View Log. It shows live update output with phase, level, and message details.


Log line format
14:32:05  [PACKAGES ]  INFO   Installing pam-gui...
14:32:41  [DATABASE ]  INFO   Applying migration 042_add_session_table.sql
14:35:12  [SCRIPTS  ]  INFO   Running post-install scripts
Level | Color / Meaning |
|---|---|
INFO | Green — informational progress message |
WARN | Amber — warning that should be reviewed |
ERROR | Red — error or failure condition |
STEP | Cyan — major update phase transition |
The log automatically scrolls to the bottom while new output arrives. If the user scrolls up, auto-scroll is paused and the ⏸ Auto-scroll paused badge appears. Clicking the badge or scrolling back to the bottom resumes auto-scroll.
Step 7 — Reboot & Reconnect
When the update completes, a Reboot Required banner appears inline on the Progress Panel. The page stays open — it does not navigate away. A countdown timer shows when the system will reboot. Click Reboot System Now to reboot immediately, or wait for the countdown to reach zero.

Automatic Reconnect
After the reboot is triggered, the page polls the server every 5 seconds. When PAM comes back online, the browser automatically redirects to the PAM login page. No manual refresh is needed.
While Waiting
The log viewer and step list remain visible during the reboot countdown. You can use the View Log and Download Log buttons to review logs before the interface goes down.
After the system restarts, wait approximately 1–2 minutes. The browser will redirect automatically when PAM is back online. The update is complete.
Language Support On Web Installer Interface
All screens support 10 interface languages. The language can be changed from the flag selector in the upper-right corner. The selected language is saved in the browser.
Turkish English German French Spanish Portuguese Arabic Russian Japanese Chinese