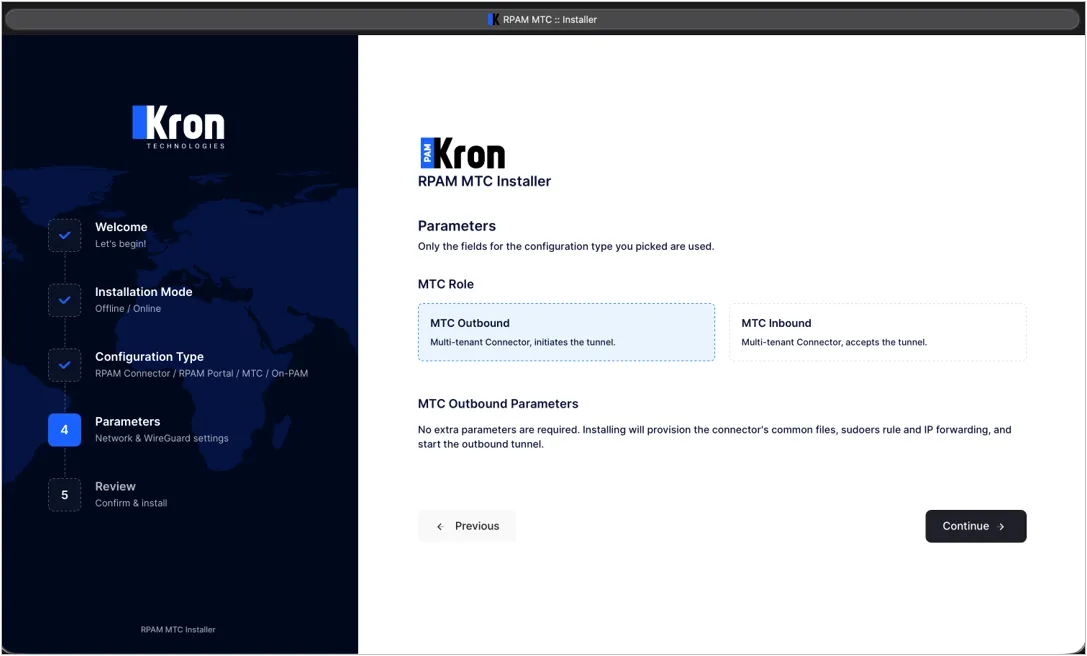
MTC Outbound
1. Select MTC Outbound as the MTC Role. No additional parameter is required for this role; the installation automatically installs the packages and JDK 20, provisions the common files of the connector (heartbeat, restricted CLI, pam-connector.service), creates the pamuser OS user with its sudoers rule and a dedicated SSH key pair, enables IP forwarding, and stops and masks the firewalld service.
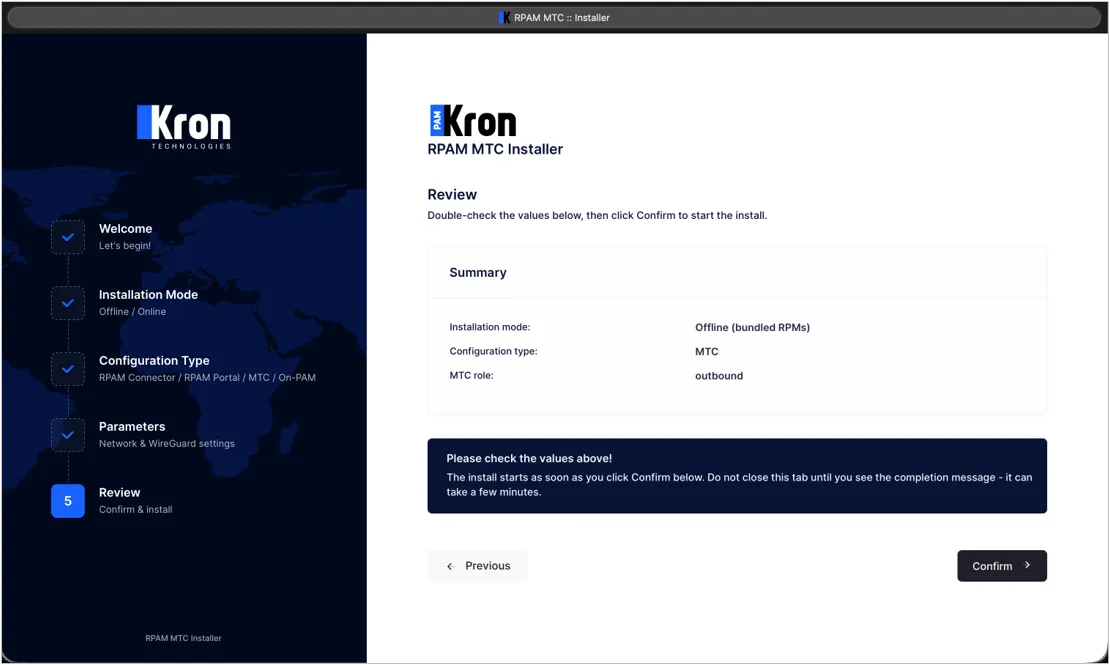
2. Check the summary on the Review screen and press Confirm.
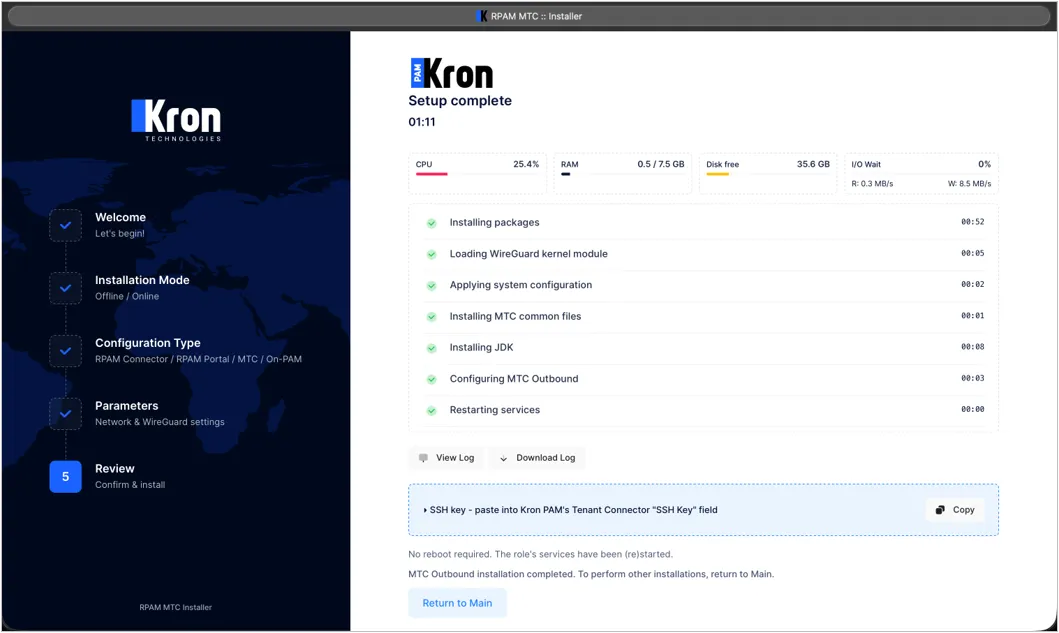
3. When the installation is completed, an SSH key box is shown. Copy this private key by using the Copy button. Kron PAM uses this key to connect to the Multi Tenant Connector as pamuser over SSH and to complete the configuration remotely. The same key can be copied again later from the "This host is already configured" page of the installer.
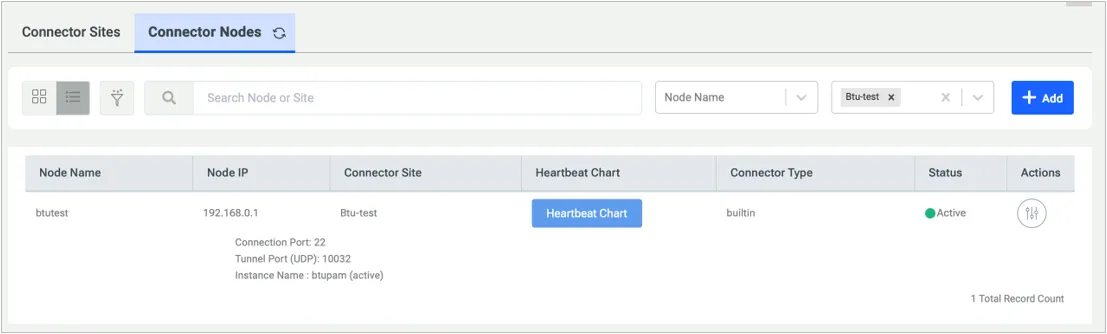
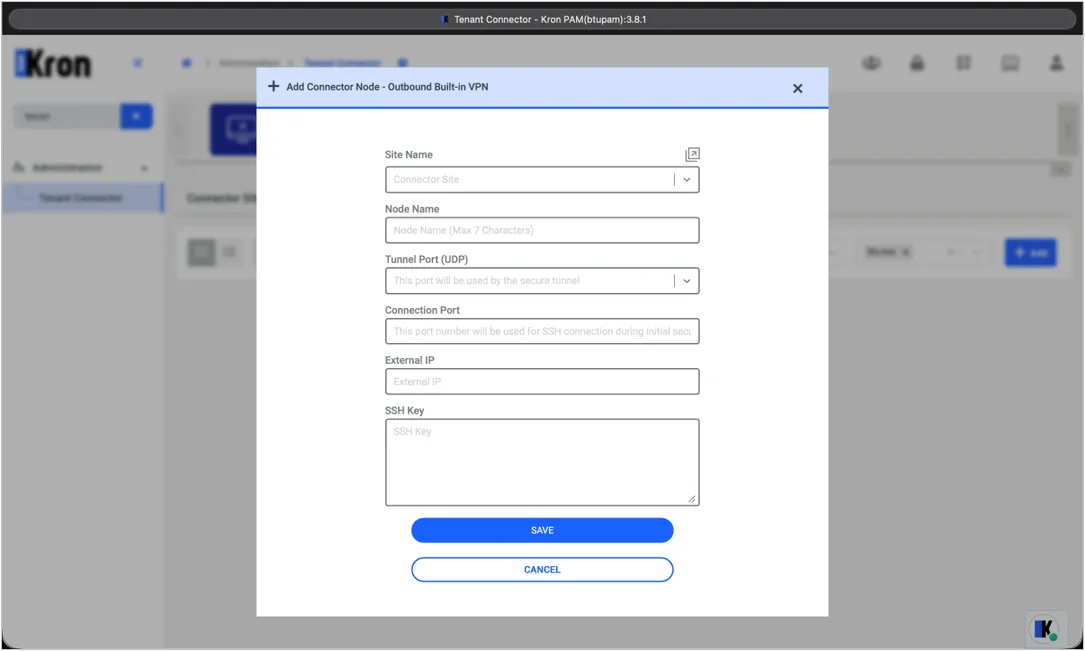
4. Go to the Tenant Connector page on the Web GUI of the real Kron PAM Server and add an outbound connector node. Paste the copied private key into the SSH Key field, fill in the other required data (Site Name, Node Name, Tunnel Port, Connection Port, External IP, etc.), and press SAVE. From this point on, the WireGuard tunnel and the pam-connector.service configuration are completed remotely by Kron PAM.
You can find the logs related to the installation steps handled by the Kron PAM Server in the connector.log file under /pam/gui/logs. In case you see the Success message at the end of the log file, the installation is successfully completed.
Check: Run the following commands on the Multi Tenant Connector:
Linux CLI | [root@connector~]# systemctl status pam-connector.service [root@connector~]# tail -f /opt/pam/connector/logs/log.txt |
|---|
On the Tenant Connector page of the Kron PAM Web GUI, check that the heartbeat is received regularly and the node status is Active.