Multitenancy
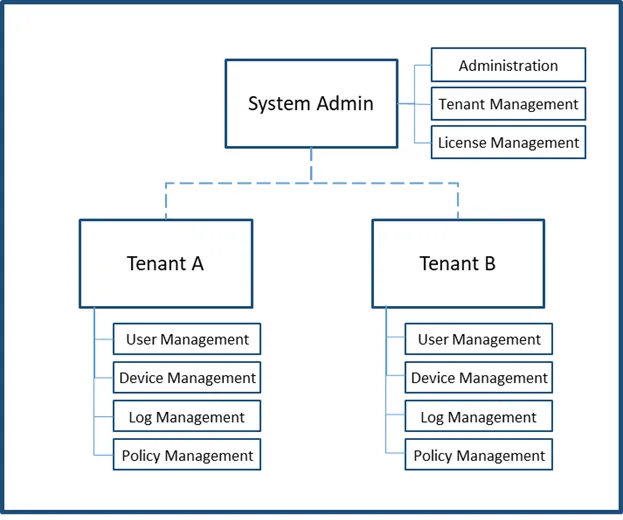
The Single Connect Multitenancy function can provide multiple and independent applications and functions. Single Connect Multitenancy enables an architecture in which a single instance serves multiple customers. Each customer is called a tenant. Tenants may be given the ability to customize some parts of the application. Tenants are logically isolated from each other. Tenant admins can only manage devices and users that they are allowed to access and can only see the logs related to the permitted devices and users.
To enable multitenancy:
- Navigate to Administration > System Config. Man.
- Set multitenancy.enabled as true.
- Save configuration.
- Navigate to Portal Function > Function Group Definition.
- Give the function group a name and select the single.connect.tenant.admin function
- Save configuration.
- Open the Function Realm Definition tab.
- Give the realm a name, select a tenant admin user group and select the function group that you created on step 6 and Save.
- Restart the Netright-Tomcat service a. Establish an SSH connection to the Single Connect IP address as the pamuser user. b. Run the systemctl restart pam-gui command to restart the service
Tenant Connector
The Tenant Connector provides secure remote data center connections to different tenants who want to use Single Connect’s features, such as preventing password theft and eliminating unsupervised access and need a secure connection between their remote data centers and the central Single Connect server. This section describes how the tenant connector is added and matched with devices.
To create an OpenVPN Connector:
Adding an OpenVPN Connector
Tenants who already have an OpenVPN server in the remote data center or want to use OpenVPN in their remote data center connections can use this feature.
- Navigate to Tenant Connector.
- Open the Connector Sites tab.
- Click the Add button, enter the remote site name and description, and click Save
- Open the Connector Nodes tab.
- Click the Add button and select the OpenVPN option.
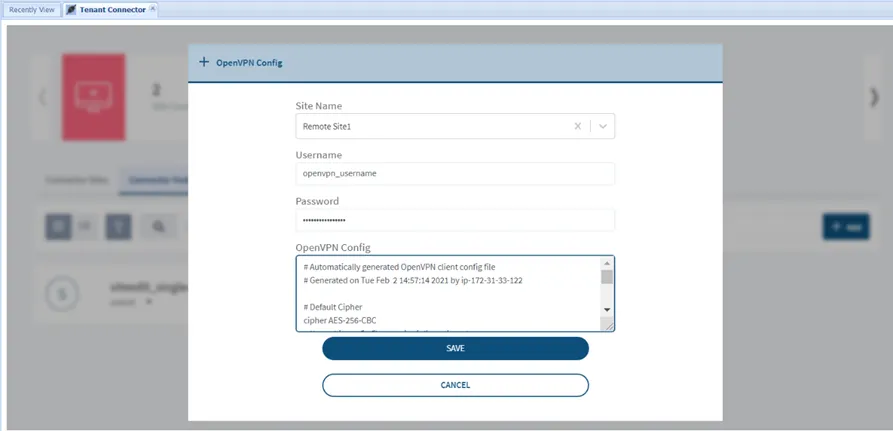
- Select the connector site, enter the OpenVPN credentials, copy the OpenVPN configuration, and click Save.
Adding a Built-in VPN Connector
Tenants who do not have an OpenVPN license and want to use Single Connect’s secure connection can use its Built-in VPN option. In order to set this connection, the connector package must first be installed on a Linux server at the remote data center.
To install the connector node to the remote datacenter:
- Download the connector installation package connector_install.tar.gz from the Single Connect repository.
- Extract the files to a Centos / RHEL server at the remote datacenter.
- Execute the install.sh script. This script installs all the required packages and configures the connector node
- Log in to the restricted CLI and execute the create ssh key command. Copy the generated SSH RSA Key.
To create a Built-In VPN Connection:
- Navigate to Tenant Connector.
- Open the Connector Sites tab.
- Click the Add button, enter the remote site name and description, and click Save.
- Open the Connector Node tab.
- Click the Add button and select the Built-In VPN option.
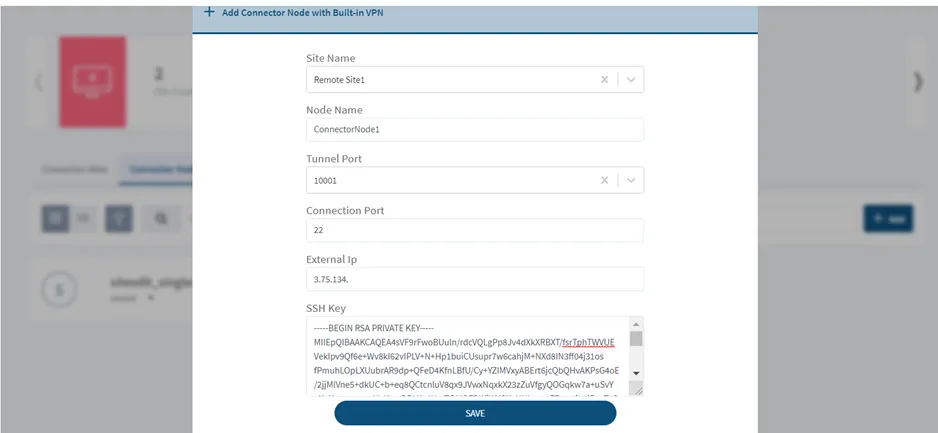
- Select the remote site name, enter the node name, tunnel port, connection port, connector node external IP, the SSH RSA Key created during the connector node installation, and click Save.
Connector Monitoring
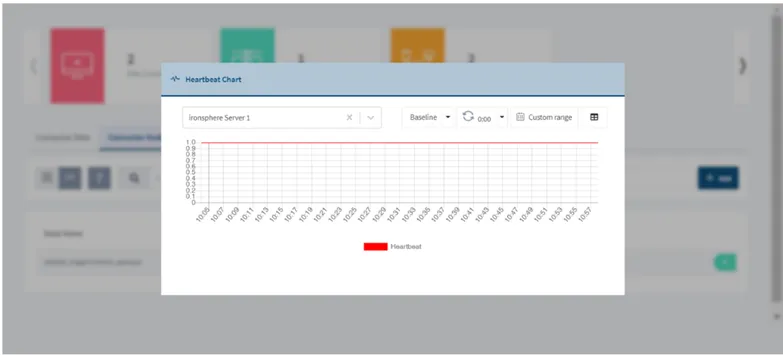
Connectors send heartbeat messages to Single Connect servers at regular intervals. This information can be used to monitor whether the connectors are working properly.
To check the heartbeat messages:
- Navigate to Tenant Connector.
- Open the Connector Nodes tab.
- Click the List view button, select the connector node, and click the Heartbeat button.
Adding a Device to a Connector Site
In order to access the devices located at remote data centers through the connector, these devices must be associated with the connector sites.
To associate a device with a connector site:
- Navigate to Device Management > Device Inventory.
- Click the New Device Discovery button.
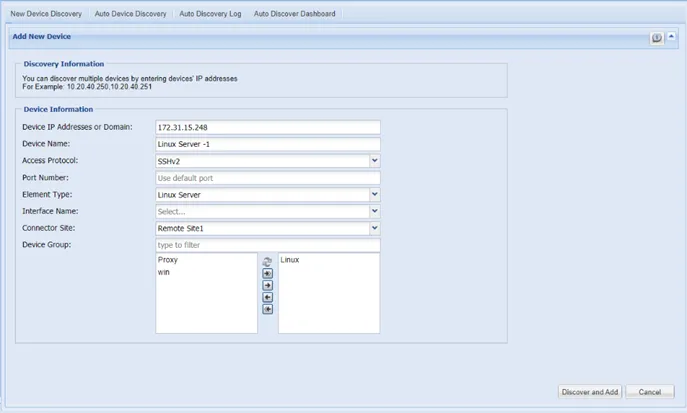
- Fill out the relevant device information, select the connector site, and save by clicking Discover and Add.