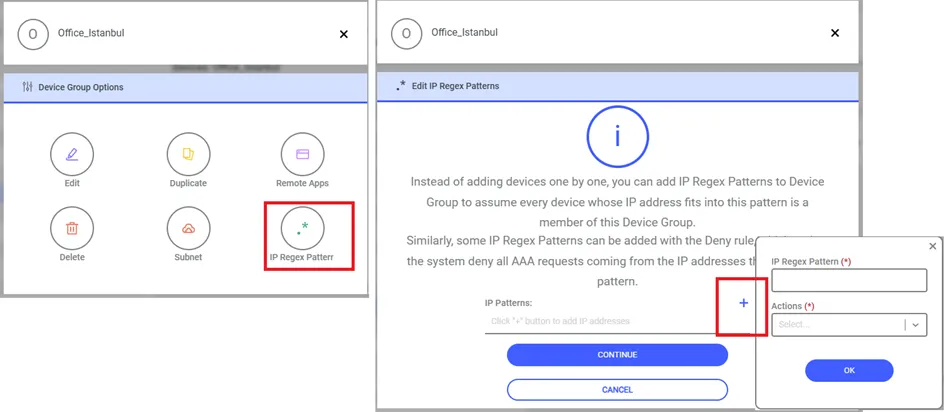
Device Group Actions Menu
There is a list of device groups on the left side of the Inventory page. Clicking a device group action menu opens a window with the following items:
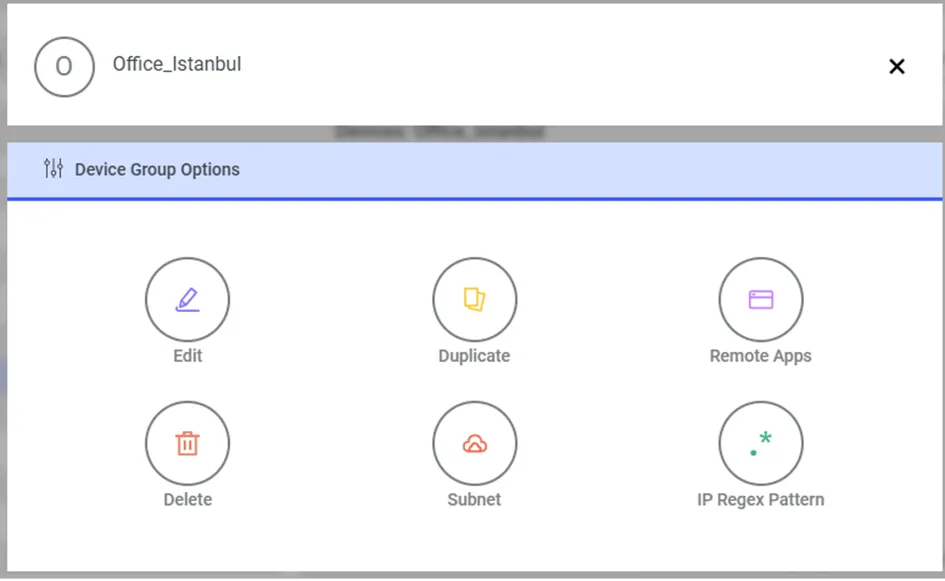
Edit Device Group
The Edit Group option is used to change the defined Device Group parameters.
To edit Device Group: 1. Navigate to Devices > Inventory. 2. Select a Device Group, then click Options. 3. Change Group Name, Description or Parent Group information. 4. Click Next. 5. Change other relevant information if needed. 6. Save.
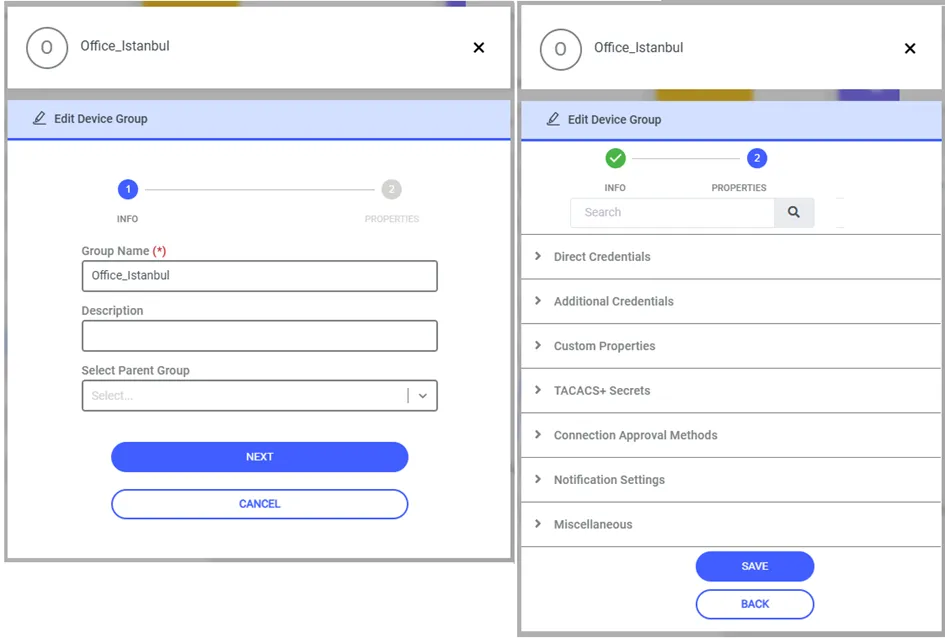
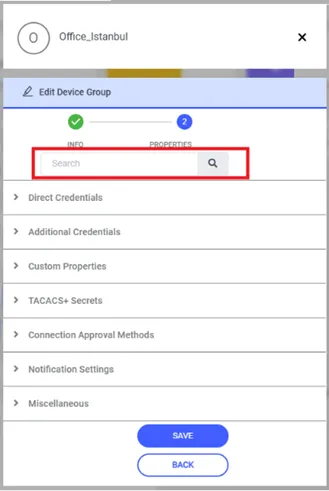
When the user clicks the Edit button for the selected group and goes to the second page (using the Next button), the group parameters panel will show up. If the user wants to search for a parameter by name, the search textbox shown in the screenshot below can be utilized. Kron PAM will search for the relevant parameter and open the panel that includes it.
Direct Credentials: Users that are predefined in the target device group are called Global Users. The credentials defined for these users (username, password, or private key) are used to access the target devices directly.
· Username: Specifies the user account used to connect to the target device.
· Password: Specifies the user used to connect to the target device.
· Private Key: Specifies the private key used for SSH connections to the target device.
· Private Key Passphrase: Kron PAM allows users to establish an SSH connection using a valid passphrase. To use an SSH key, the Direct Credential Username and Private Key Passphrase must be defined for the device group.
· Additional Credentials: It allows the user to choose the correct account when there are multiple credential options while connecting to the target system. It also lets the user include additional credentials from different sources, such as session user, manual login, assigned credentials, or private keys stored in the vault.
· Add Session User to Credential Selection: When this option is enabled, the user can connect to the target device using the same account they used to log in to Kron PAM. For passwordless access, the username on the target device must be the same as the session user. If Direct Credentials are empty, Kron PAM[HK1] tries to connect using the session user.
· Add Manual Login to Credential Selection:When this option is enabled, users can enter their username and password manually during proxy connections.
· Add Assigned Credential to Credential Selection:When this option is enabled, users can connect to the target device using assigned credentials if a vault account is assigned to them.
· Add Vaulted Private Key to Credential Selection:[EA2] [FK3] When this option is enabled, users can connect to the target device using an SSH private key securely stored in the vault. This enables key-based, passwordless authentication to the target system without exposing the actual private key to the session user.
· Custom Properties: It is a configuration area used to add and manage custom parameters that are not available in the default system settings. These properties allow users to customize system behavior based on specific needs.
· TACACS+ Secrets: Used to define authentication secrets for TACACS+ and RADIUS.
· RADIUS/TACACS+ Key: This is the shared secret key used between the device and the TACACS+/RADIUS server.The same key must be configured on both the server and the Device Group in Kron PAM. It is used to verify and secure the authentication communication.
· Enable Password: This password is used to switch from a low privilege level (user mode) to a higher privilege level (enable mode) after authentication.It is required when the device uses privilege levels.
Connection Approval Methods: It defines additional controls for user connections.
· Require Managerial Approval: When enabled, users must get approval from their user group manager before connecting to the device group. The connection request must be approved before access is allowed.
· Require user to enter a reason for connection: When enabled, users must enter a reason before starting a connection (such as RDP or SSH). This reason is saved for audit and tracking purposes.
Notification Settings:
· Miscellaneous: This section includes additional settings for the Device Group that are not part of the main configuration. These settings are used to customize behavior and visibility.
· Show in Device Tree: It makes the device group and its devices visible in the Device Tree.
When enabled, users can see and access devices from the tree structure.
To use this feature, the following portal functions must be assigned to the user or role:
· netright.discovery.moduleVisibility
· aioc.discovery.discover.device
· single.connect.rdp.client.moduleVisibility
· single.connect.cli.moduleVisibility
If these permissions are missing, devices may not be visible even if this option is enabled.
· Use as Role Group:
· Use Email as Username During Login:When this option is enabled, users can log in using their email address instead of a username.
· Authentication Script: The “Authentication Script”, “Switch User Script” and “Show Without authScript Option” fields used under Miscellaneous panel are explained in detail in the
o Session Manager - SSH Proxy - Running Scripts at the Beginning of an SSH Session
o Session Manager - SSH Proxy - Switch User Script
section.
Duplicate Device Group
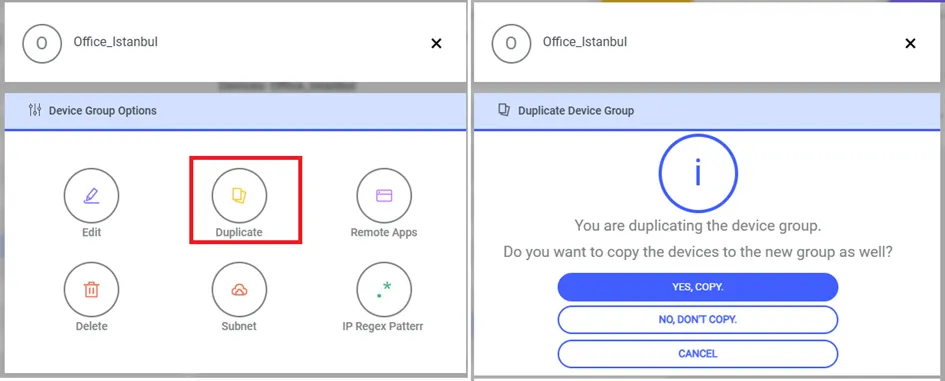
This option creates a copy of the device group with the same parameters.
To create new Device Group using Duplicate button: 1. Navigate to Devices > Inventory. 2. Select defined Device Group and click Options. 3. Click Duplicate. 4. Choose whether you want to copy the devices of the original group over to the duplicate group. If you choose not to, only the device group properties will be carried over to the new group. 5. Fill out the Group information fields as needed. 6. Save.
Remote Apps
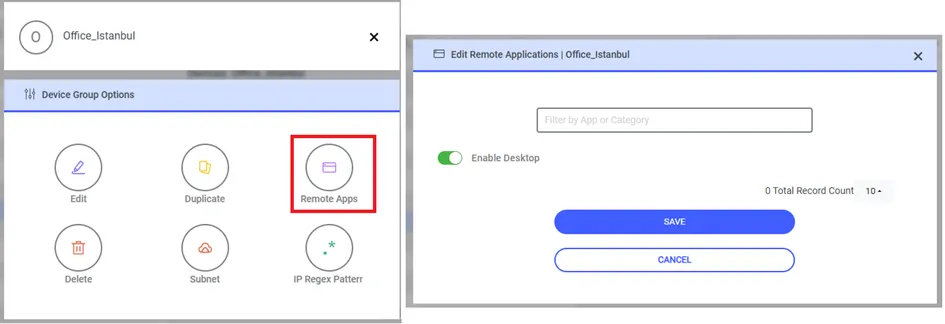
Kron PAM enables limiting the accessible applications on Windows devices. It is possible to allow specific applications for Device Groups. This option also can be used with the auto-login feature.
To define Remote Apps:
1. Navigate to Devices > Inventory. 2. Select a Device Group and click Options. 3. Click Remote Apps. 4. Switch the Enable Desktop parameter on if you need to permit full desktop access. 5. Click Save.
Delete Device Group
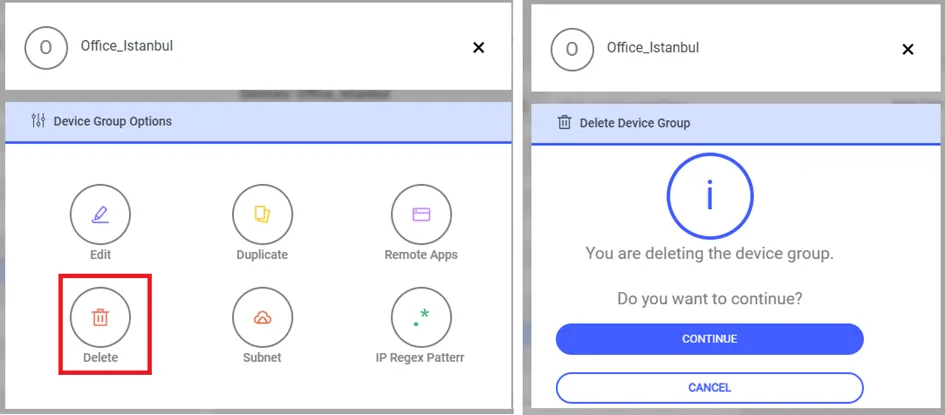
To delete a Device Group: 1. Navigate to Devices > Inventory. 2. Select a Device Group and click Options. 3. Click the Delete button on the menu. 4. Click Continue.
Subnet
This feature is used for the two solutions below:
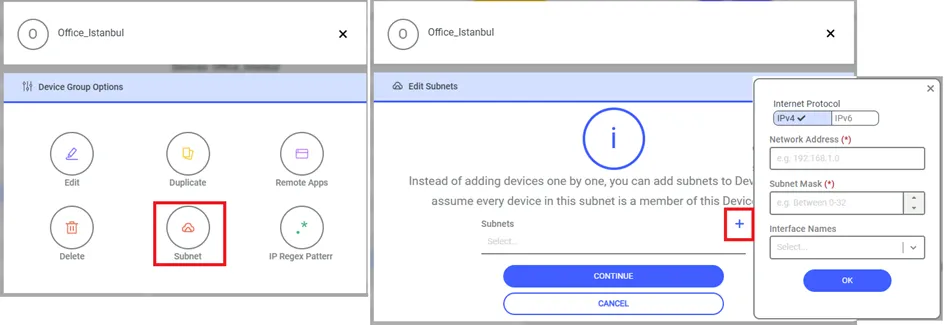
- Instead of adding devices one by one, a subnet can be added to connect to target devices. Only the TACACS+ Access Manager uses this feature. All devices in the subnet interval are accessible to connect to.
- The defined subnet can be used for Device Auto Discovery.
To create Subnet: 1. Navigate to Devices > Inventory. 2. Select defined Device Group then click Options button. 3. Click the Subnet button on the menu. 4. Click the + button. 5. Select an Internet Protocol. 6. Fill out the Network Address , Subnet Mask, and select Interface Names. 7. Click OK, and then Continue.
IP Regex Pattern
Instead of adding devices one by one, an IP Regex Pattern can be added to the Device Group. Every device whose IP address fits into this pattern will be regarded as a member of this Device Group. Similarly, some IP Regex Patterns can be added with the Deny rule, which makes the system deny all AAA requests coming from the IP addresses that fit into this pattern. Only the TACACS+ Access Manager uses this feature
To create IP Regex Pattern: 1. Navigate to Devices > Inventory. 2. Select defined Device Group then click Options button. 3. Click the IP Regex Pattern button on popup 4. Click the + button then fill out the IP Regex Pattern andselect Actions field. 5. Click the OK button then navigate Continue button.